Theme Support:
We have dedicated support system where you can ask question and get
support for our theme.
Go to support site
First, thank you for purchasing our theme!
This guide provides instructions for installation, help on getting started and extensive documentation of features. It is recommended you read it thoroughly to fully leverage the Liviza theme's capabilities. Please also make sure to check out our Video Tutorials as they explain everything covered in here in greater depth. We hope you enjoy building with Liviza as much as we enjoyed developing it and continue to develop with new features!
Before beginning the installation and configuring of your new theme, you must first have WordPress already installed on a server.
If you are struggling, here is a very detailed guide at WordPress Codex that will walk you through every step.
If you prefer something more visual, you can watch this video tutorial on how to install Wordpress by us
(Please note the video shown is third party video, but the same process applies)
Once you have setup a copy of WordPress, there are multiple ways you can go about installing the theme. Here are different ways:
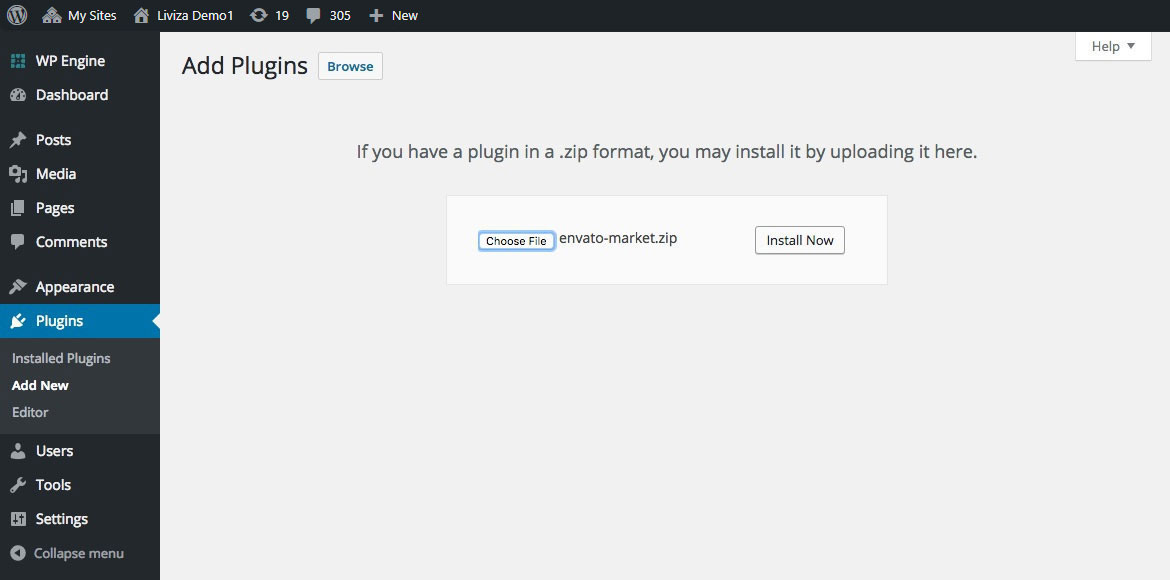
This is the easiest method to install our theme. Just install "Envato Market" plugin and configure it. This "Envato Market" plugin also provides one-click update feature for our theme. We will create a video for this.
Also here is step by step guide with details and images:
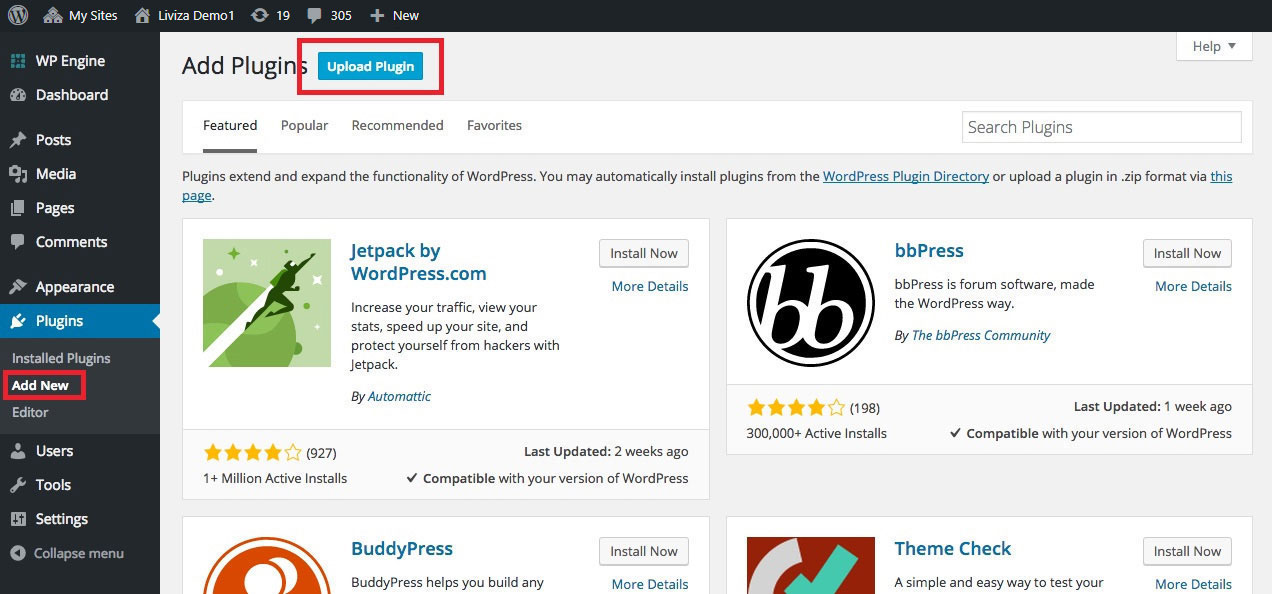
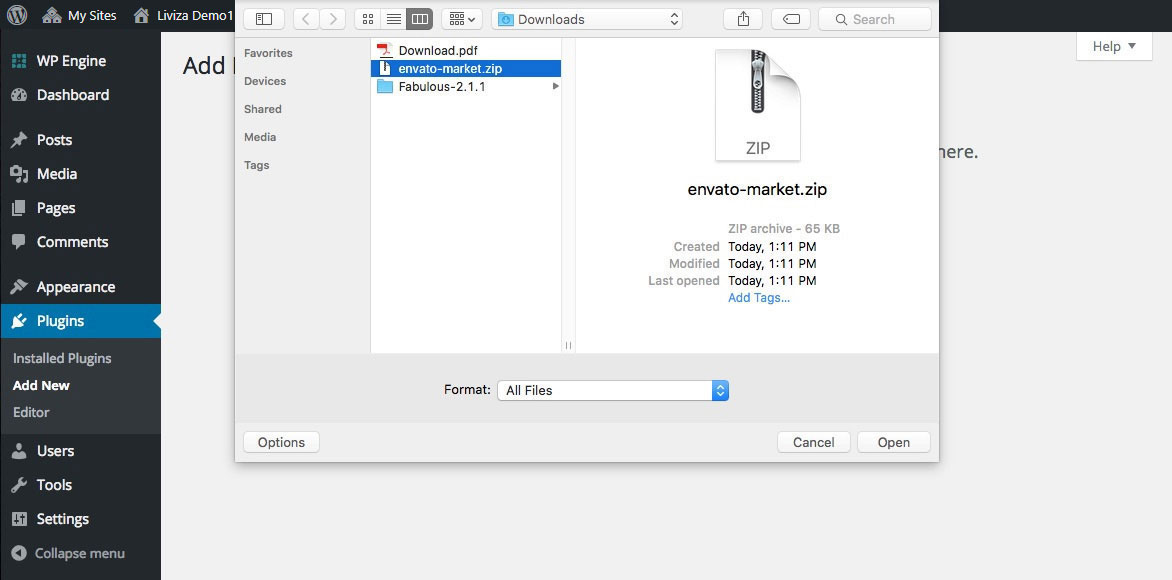
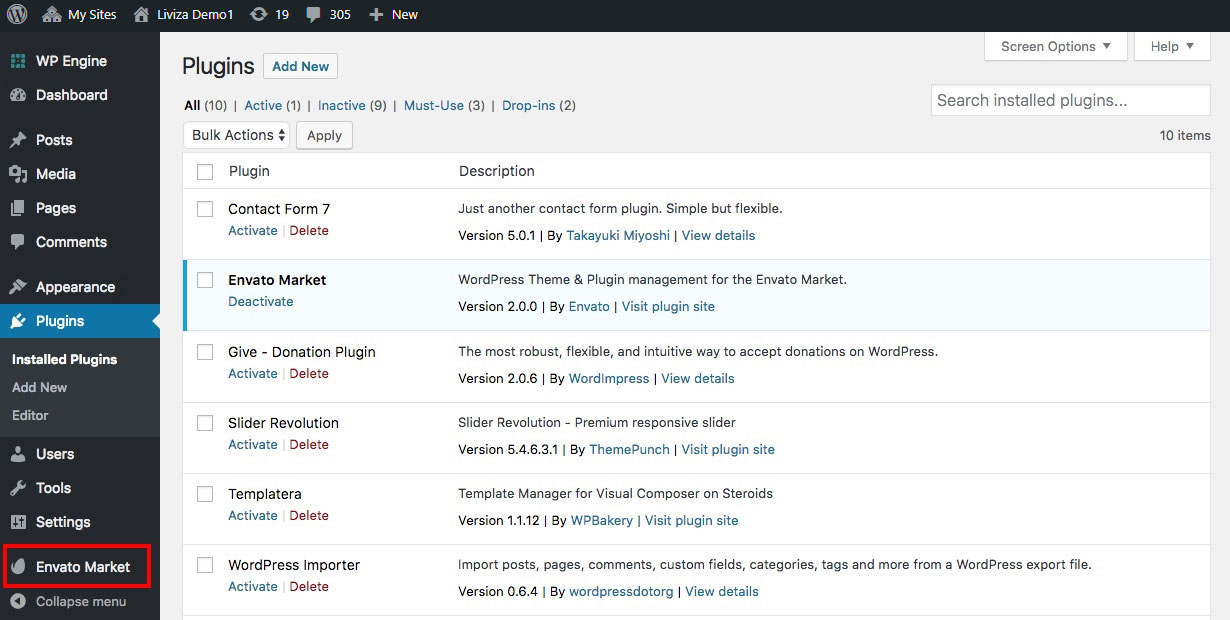
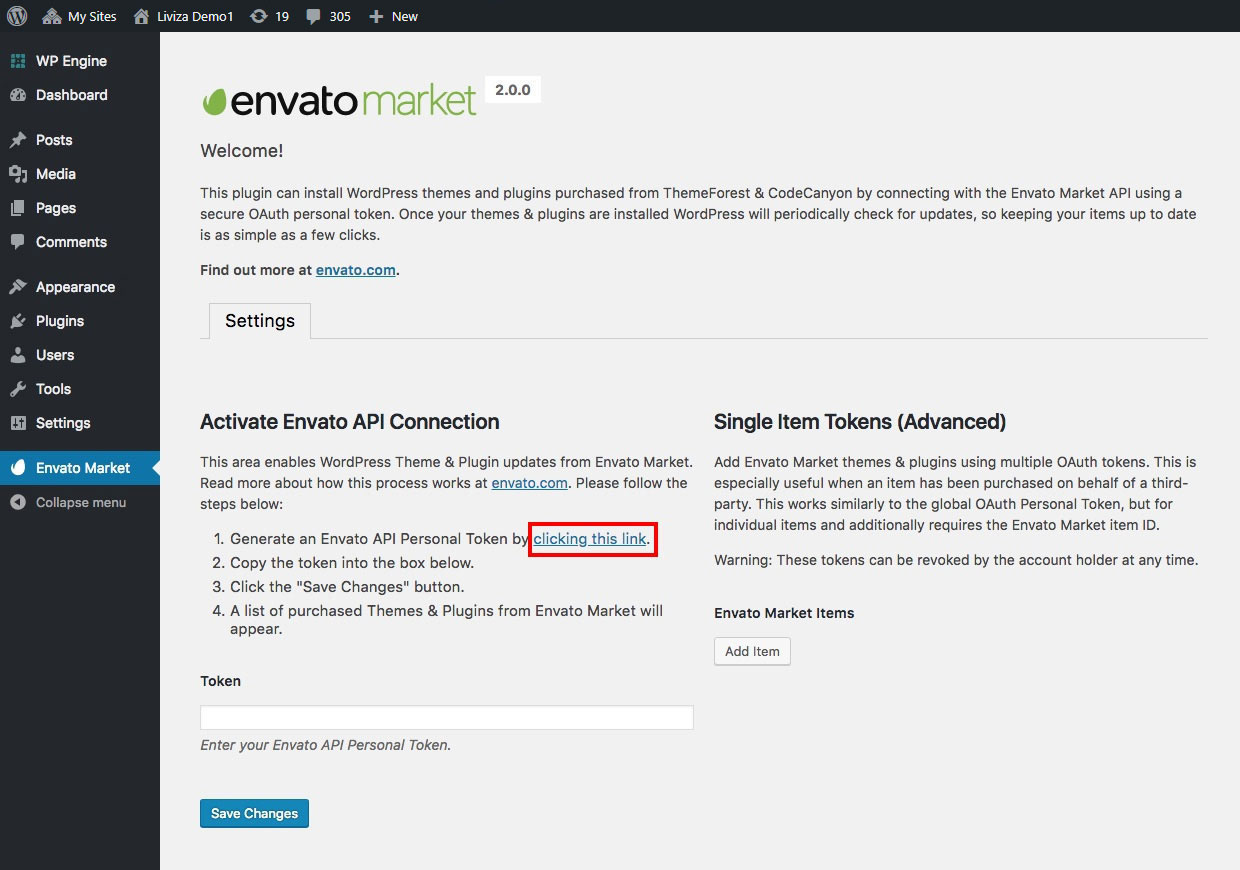
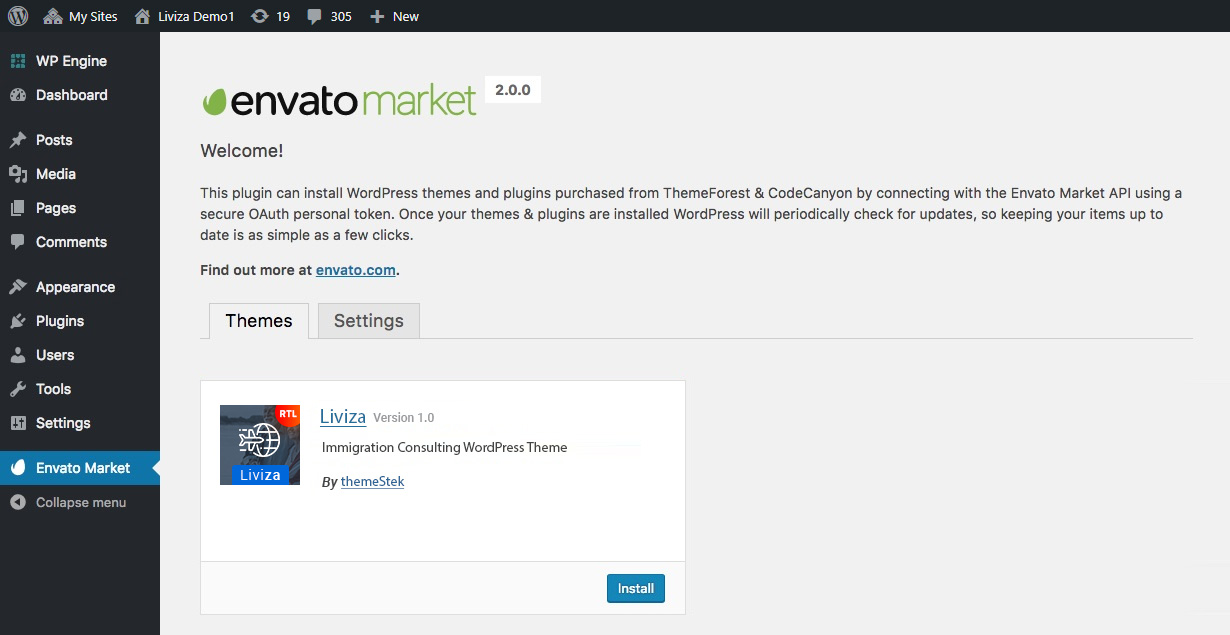
To get started click on the "Envato Market" link in your dashboard menu. You should see a screen similar to the one below. The very first step is to create an Envato API token. To do this, click on the generate a personal token link (highlighted in red below).
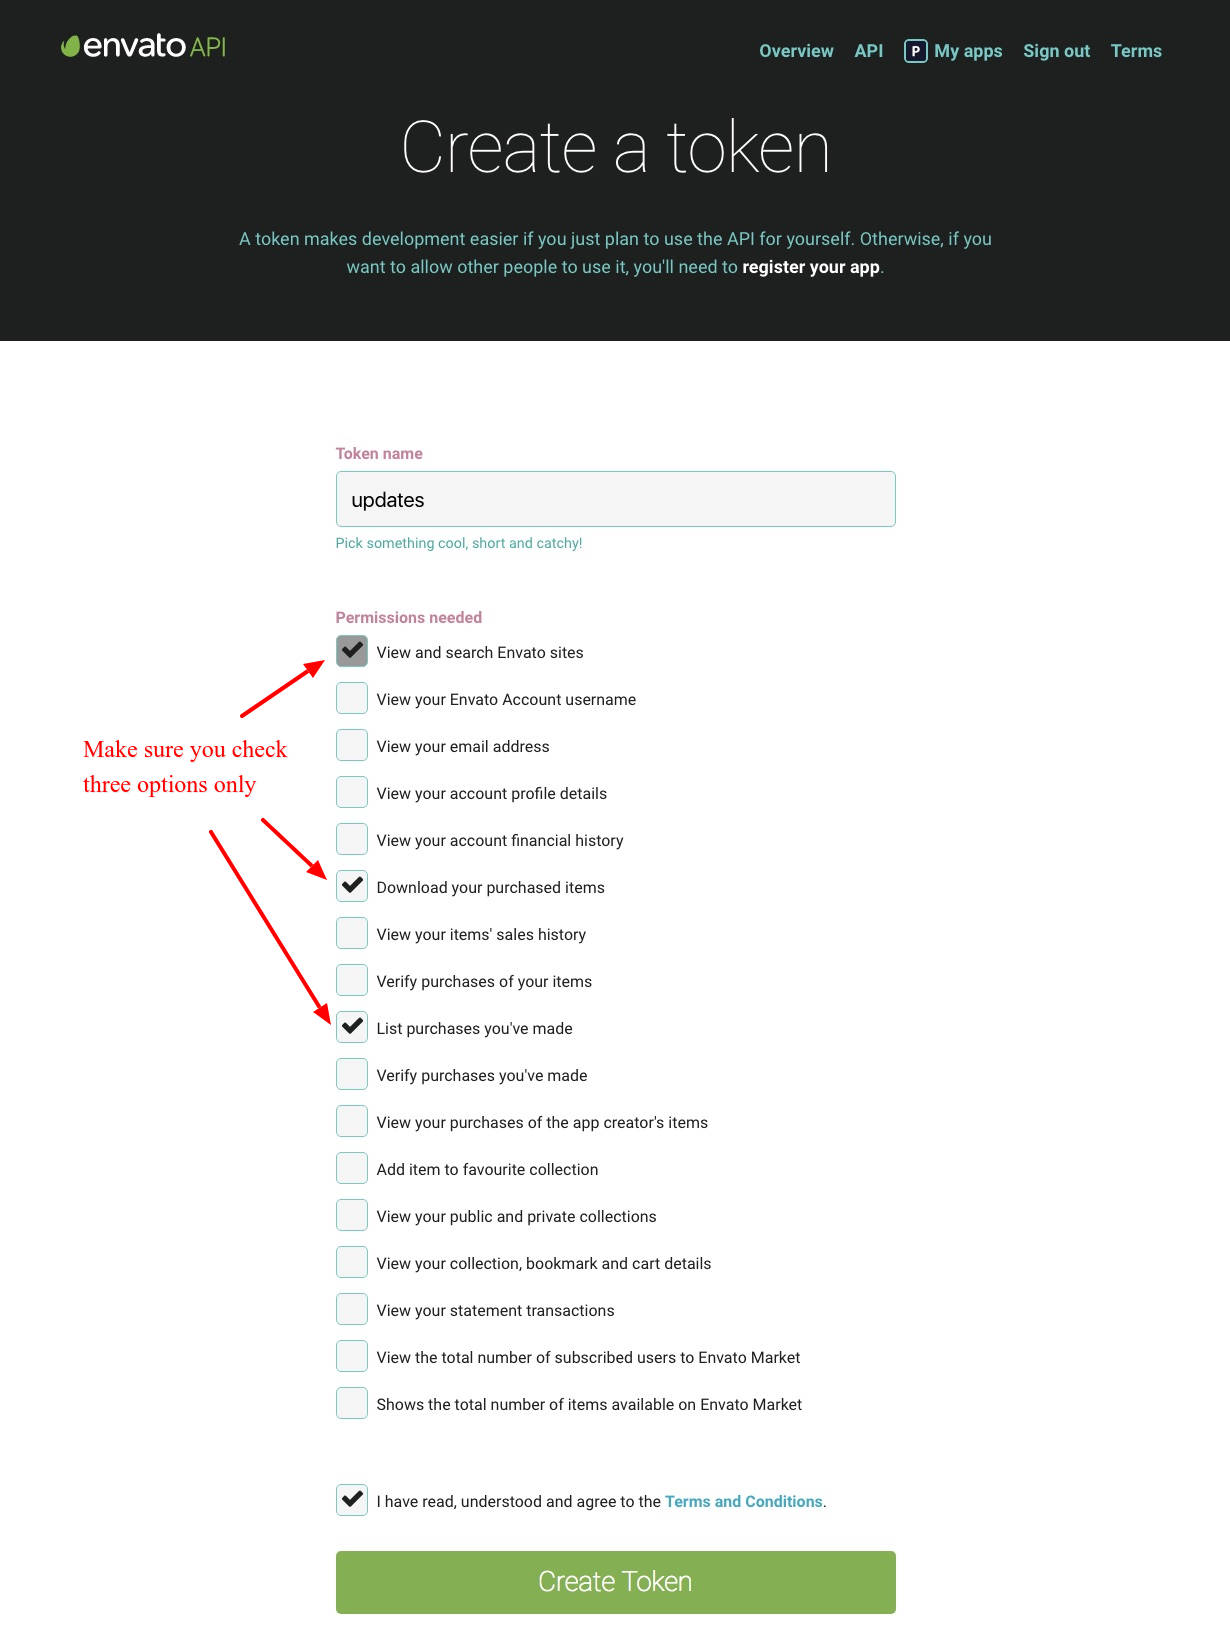
If you’re already logged into your Envato account you’ll be token to the screen below (otherwise you will be prompted to login first before being redirected to this page). On this screen you can see what the Envato Market plugin is requesting permission to access via your Envato account (Envato sites, the ability to download your items, a list of your purchases and verification of your purchases). To proceed give your token a name, check the box that you have read and agree to the terms and then click the green button to create your token.
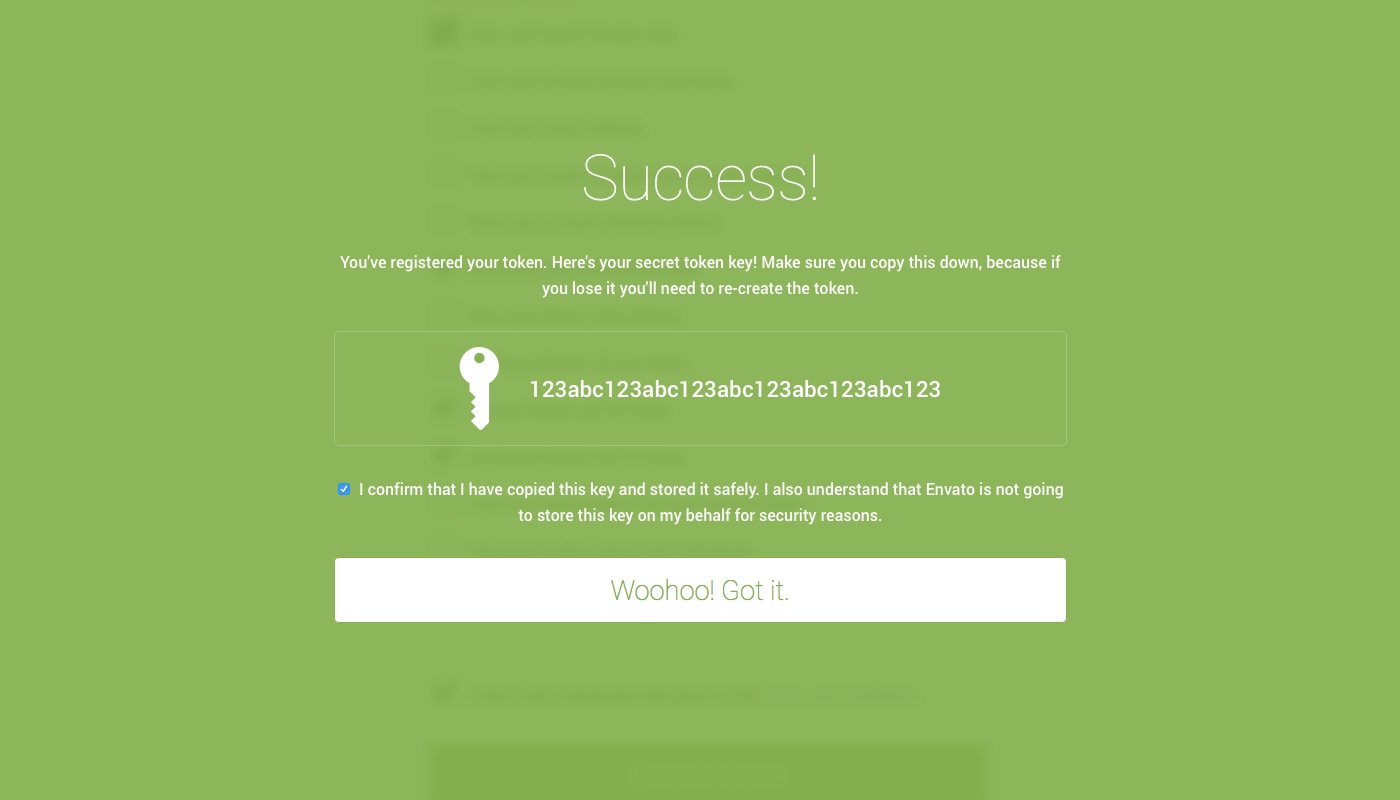
Once your token is created you will see a green success screen. Copy your token code (this is very important since Envato doesn’t store a copy of the token for you), check to confirm that you’ve copied it and click the white button that you got it.
Now go back to your WordPress installation and paste in your Envato API token then click save.

It’s possible that you might see the error (shown below) when you first enter your token. Don’t worry, just go back to the previous page and try again. It should work on the second go.
Once your token is saved and validated your page will refresh to show your Envato Market landing page with added tabs for your items. The added tab(s) display all of your theme and plugin purchases as well as their version numbers and quick links to the theme and author pages. So now you can install theme and also update theme in just one click.
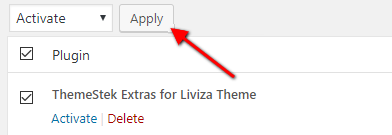
After theme installation, just activate it and it will ask to install some required and recommended plugins like this:

Below is the list of the plug-ins that come included into the theme.
To make the theme work properly and get benefit of all features, we recommend you to install all above plugins. See steps given below to install all plugins:
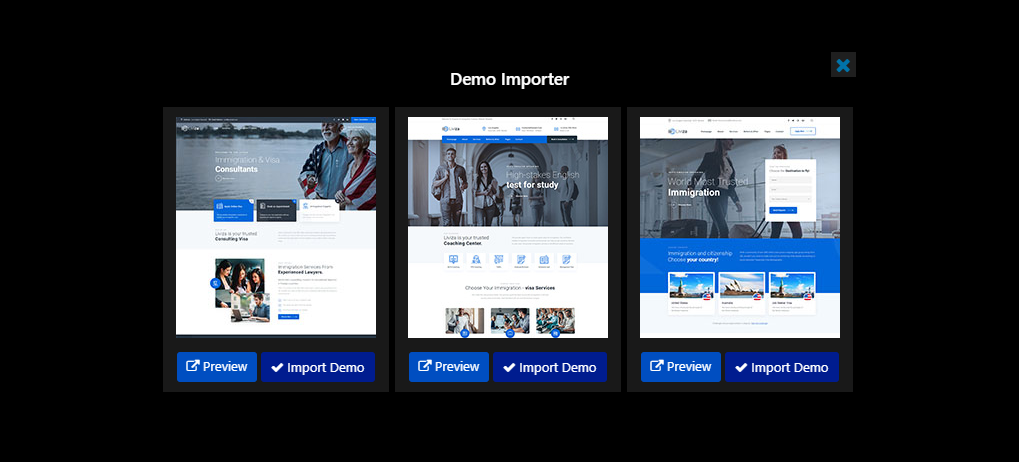
Our theme includes a simple One-click demo data installation, which allows your site to look exactly as on the theme demo.
Before installing demo data, please make sure you have installed all the required/recommended plug-ins. (Check the Plug-ins installation section for more information)
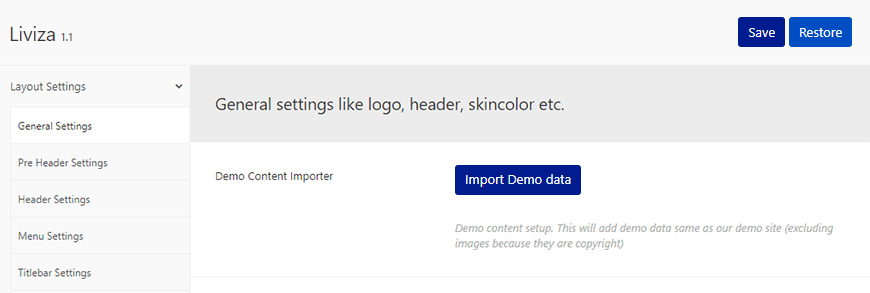
In order to import the demo content go to Admin > Liviza Options > General Settings section. You can see Import Demo Data button. Just click on it.
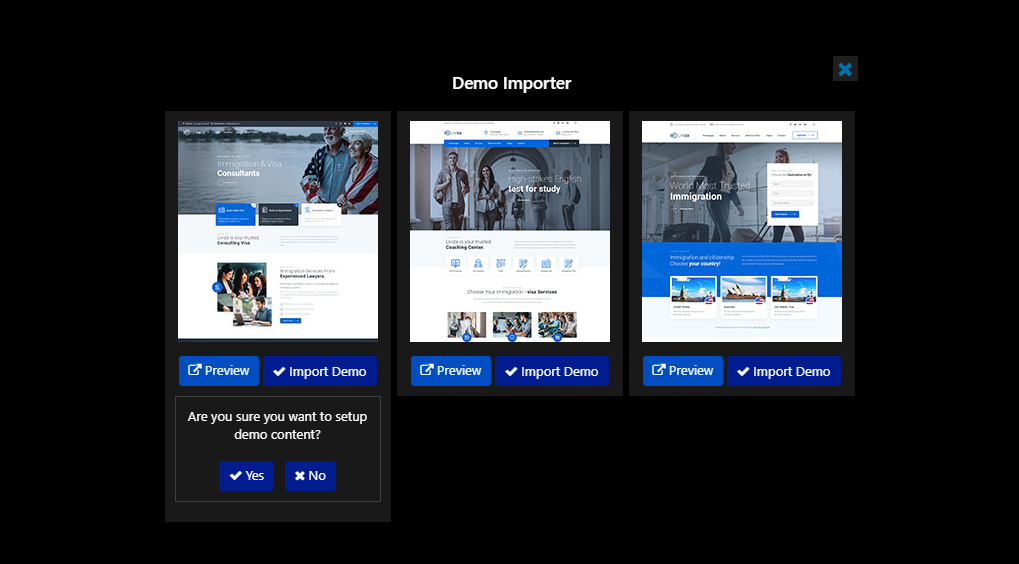
Now you can see Demo Importer box. You can see three options here. You can setup any demo you want. Just click on Import Demo button given below any of the thumbnail.
After that, it will ask for conformation, just click on YES button:
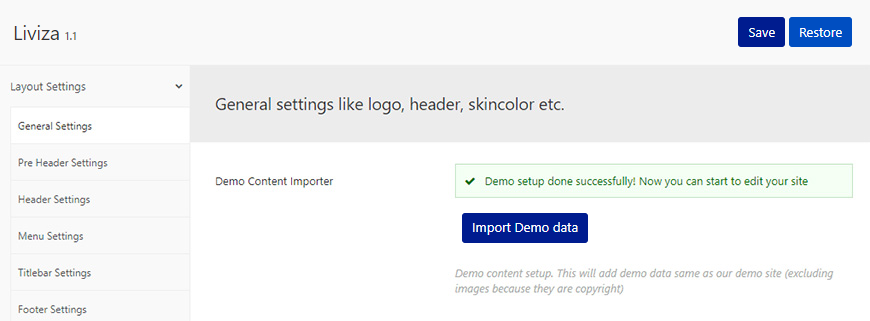
Than after your conformation, it will start to import demo content setup:

After all finished, the page will refresh and show you conformation like this:
If you want to make changes to the theme's files and functions, we recommend installing a child theme. This ensures that your theme customizations stay in place after the theme update. If you are not planning to change the core theme files, you are free to skip this chapter.
A child theme is installed the same way you install a parent theme. Locate the liviza-child.zip file in the theme package and upload it via the WordPress admin panel. Alternatively, you can unzip it and upload via FTP (see main theme installation chapter).
Your child theme has its own functions.php file. Use it to copy modified functions from the parent theme's functions.php, or register new functions.
All the different blocks are created with template files which you can copy in child theme to and modify it easily. For this, just create theme-parts folder in child theme and copy files from parent (main theme) theme and modify it.
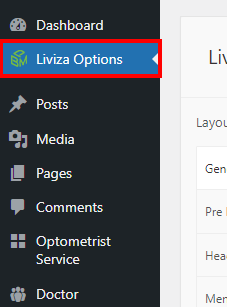
There are different sections in Liviza theme. Here you will find name of each section name so you can find their options easily. You can customize each sections from Liviza Options easily.
Liviza Options (Theme Options) panel is created with WordPress' Customize section. We added our own options with WordPress' default options.
Also this Customize options panel will provide live preview of the effects so you can see the effect of each options here.
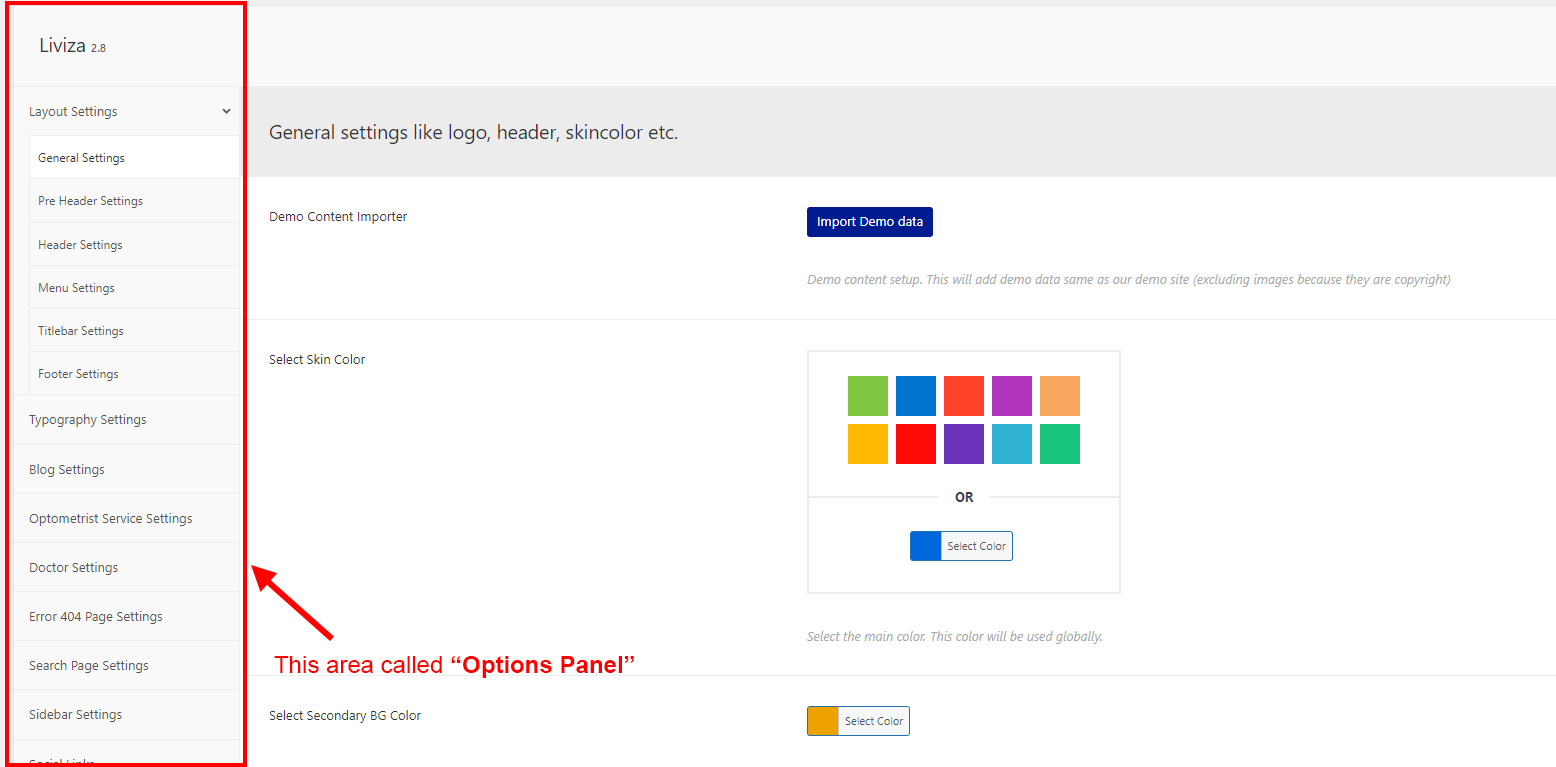
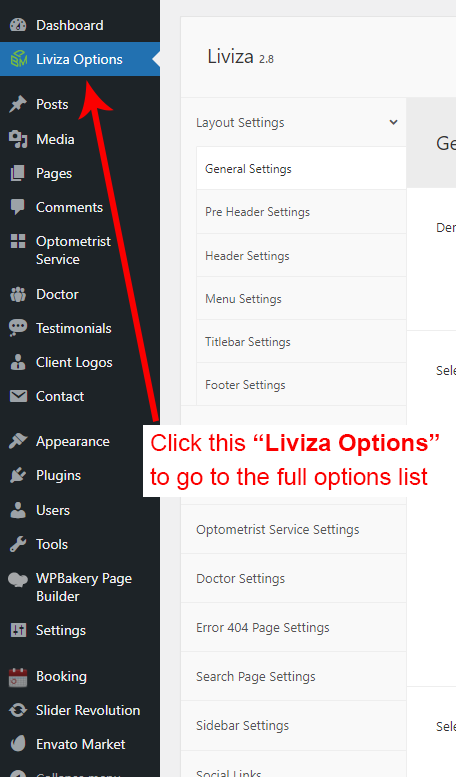
After clicking on the Liviza Options panel you will redirected to the Customize section. It has two sections. Left area called "Options Panel" and the right area called "Preview panel". See screenshot given below:
Now click on the Liviza Options and you will see lot's of options for different theme sections.
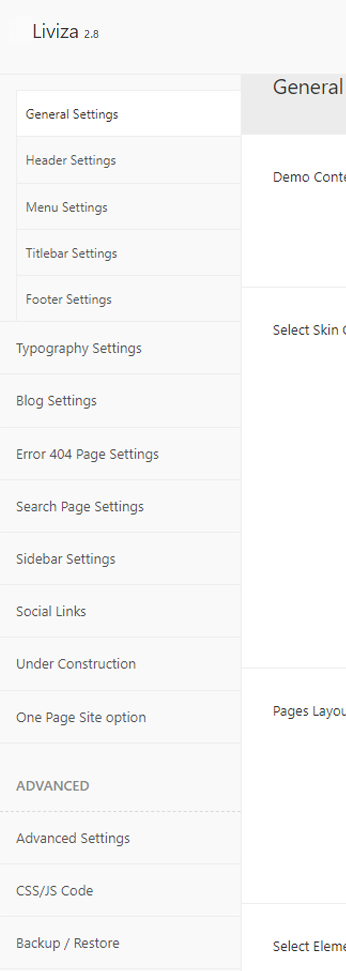
Now you can see different sections list. This are the group of the options. Clicking on each section will show options for that section.
General Options:
You can change Global color, secondary color, Gradient color, Logo etc from here.
Typography Options:
Here you can change font family, font size, folor color etc for different areas. For example, you can change font-family or font-size for general texts, H1 to H6 tags, Heading texts, Subheading texts, Widget heading etc.
Header Options:
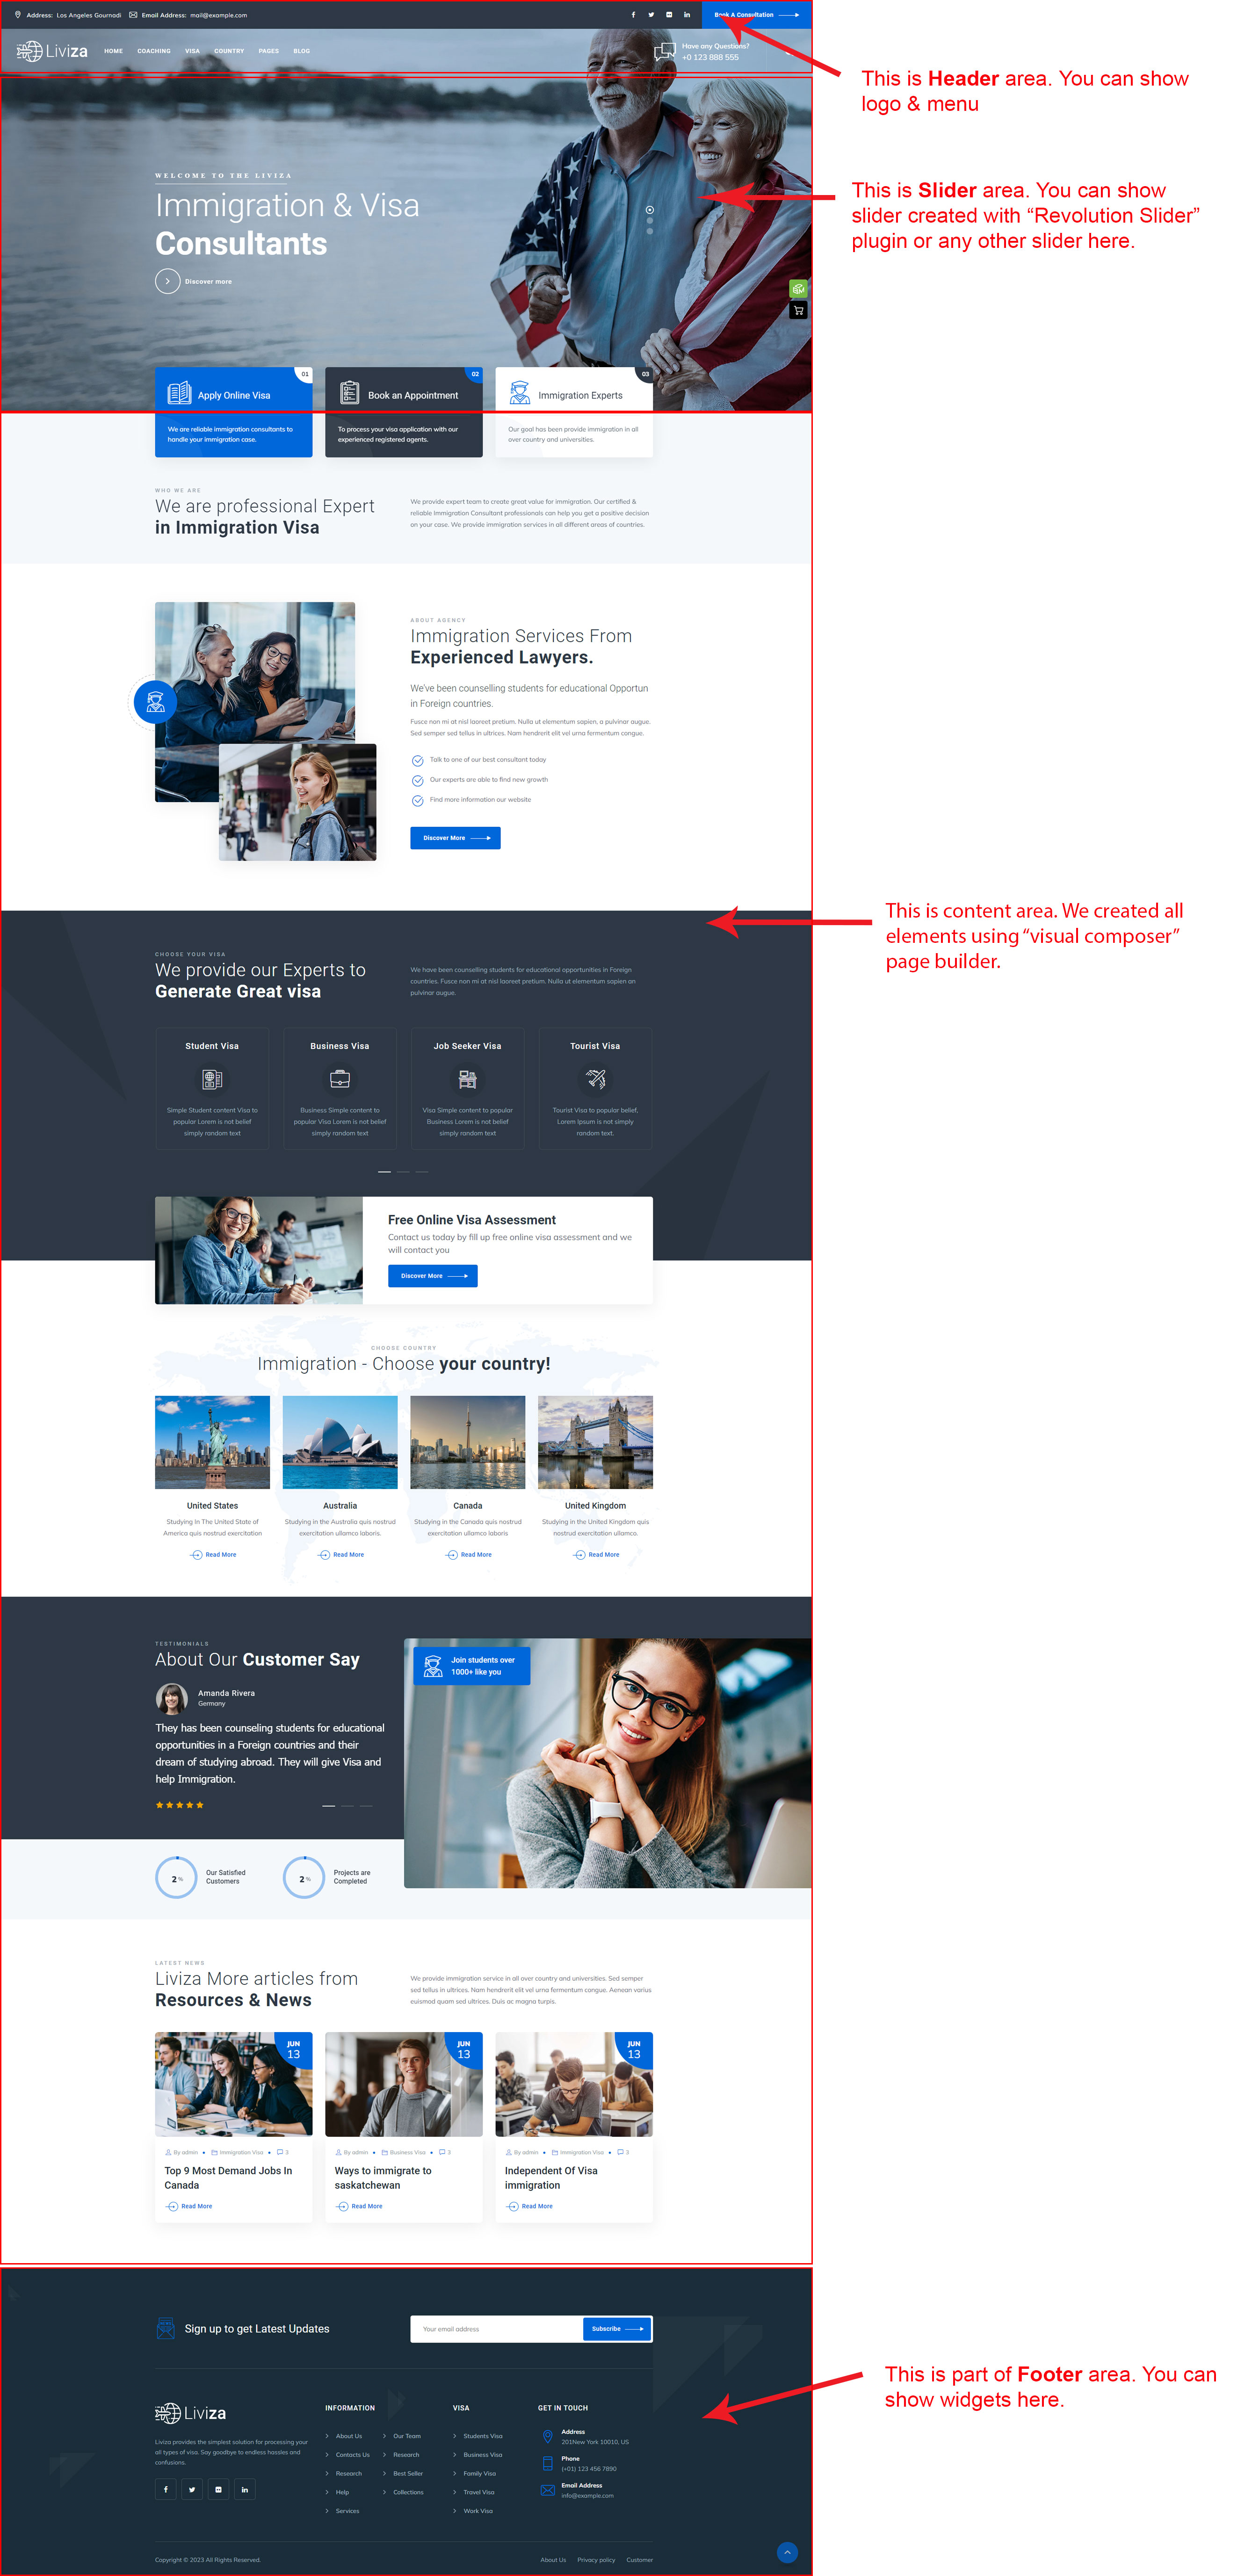
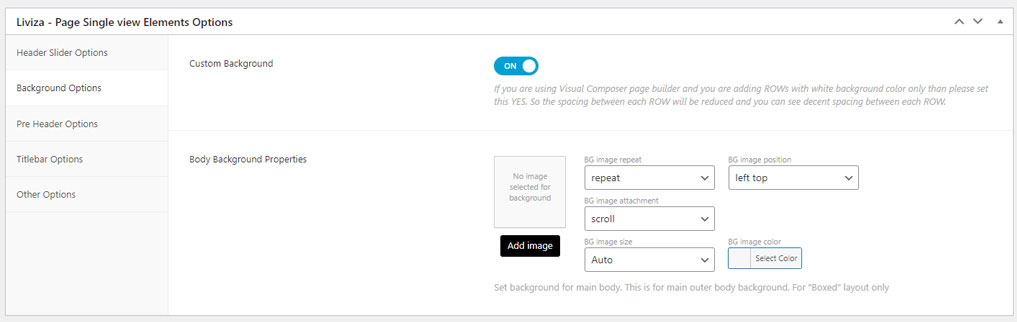
Here you can change header style. Also you can edit content specially created for special header style. Also you can edit header button options, background color, header height etc. You can show or hide search icon, shop icon (if WooCommerce plugin is active) etc. (Where is Header area?)
Menu Options:
This is for menu appear in header area. Here you can edit Main menu typography like font-family, font-size etc options. Also you can change dropdown menu options like background color, font color etc too.
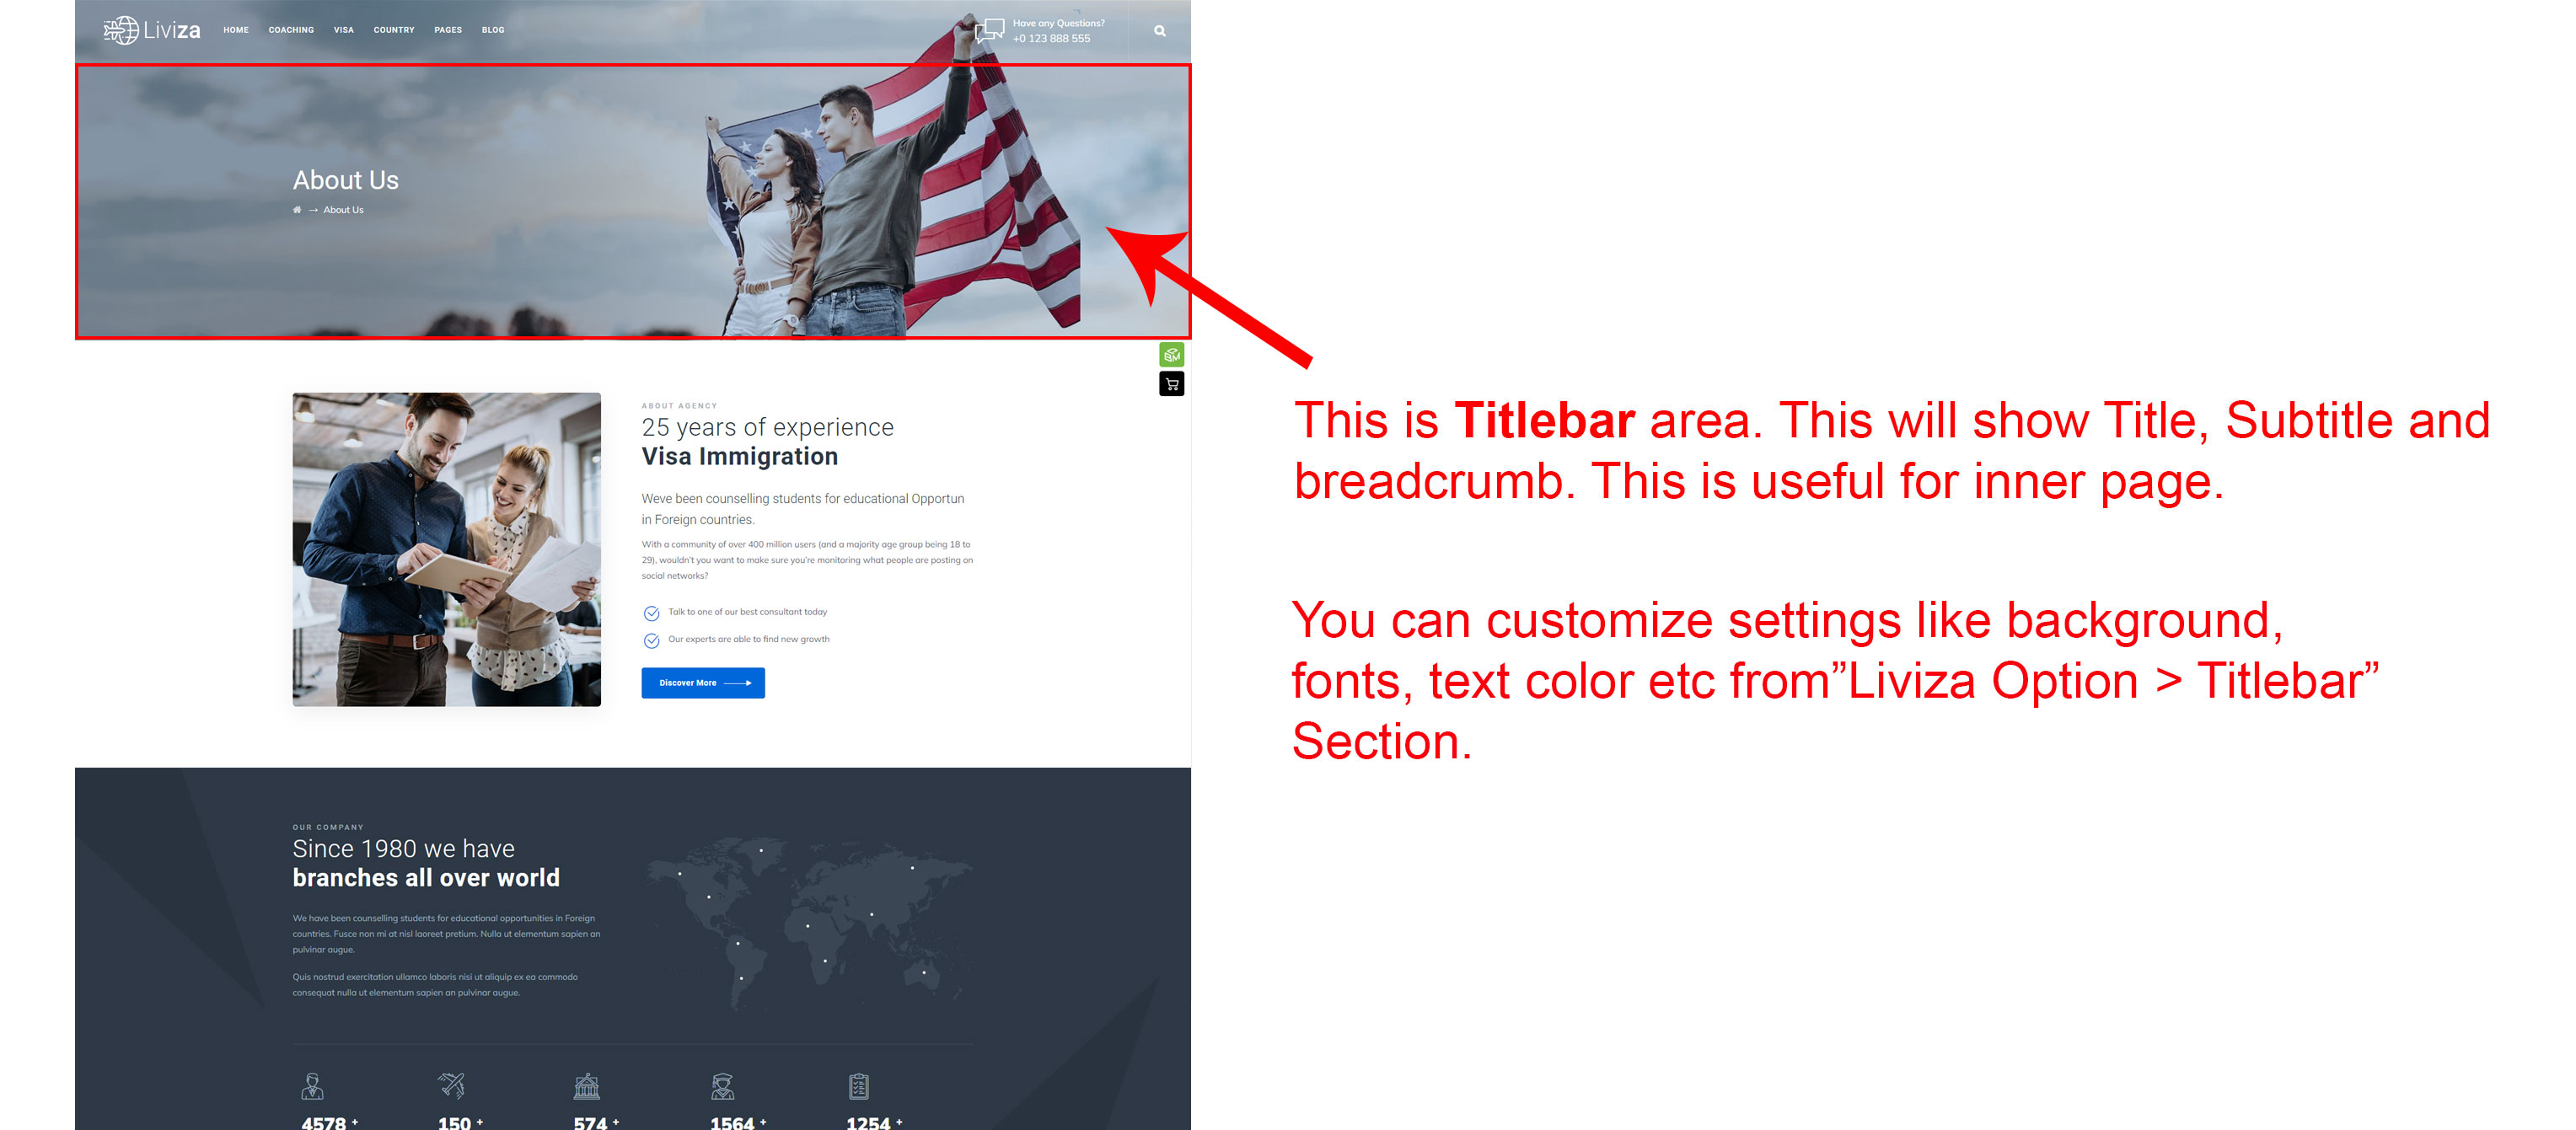
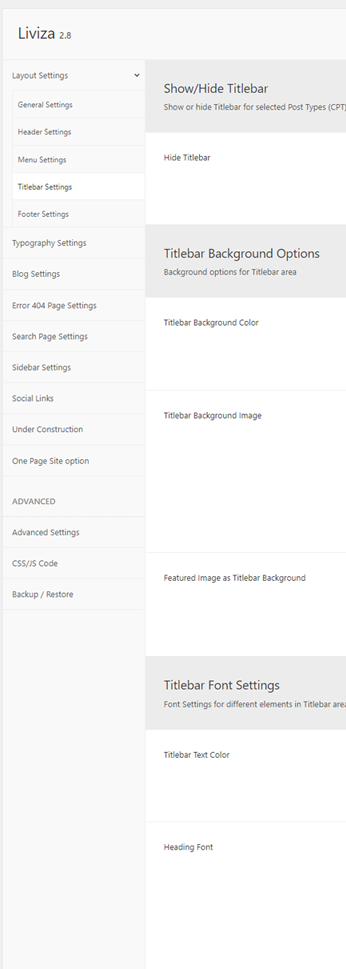
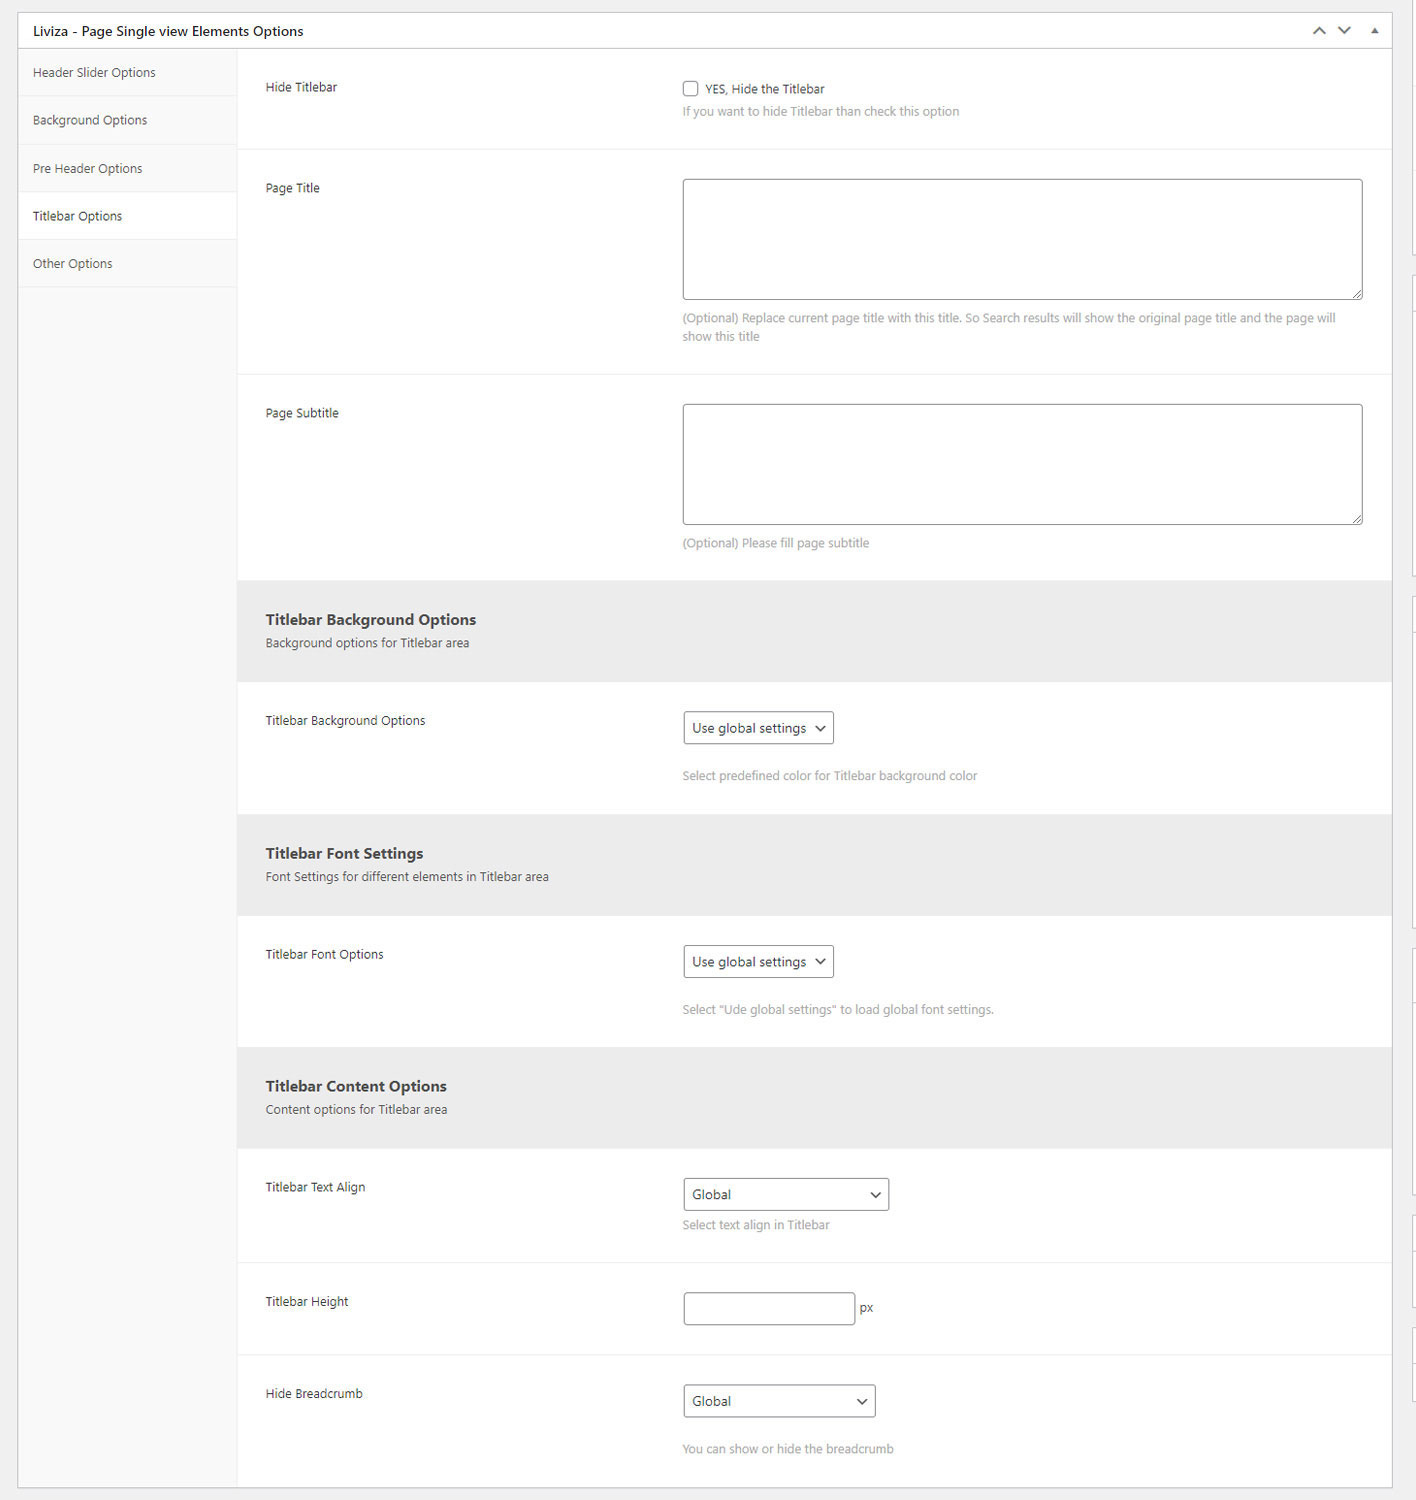
Titlebar Options:
Generally the Titlebar will appear on inner page. This will appear below header area. This will show page title, subtitle and breadcrumb. (Where is Titlebar?)
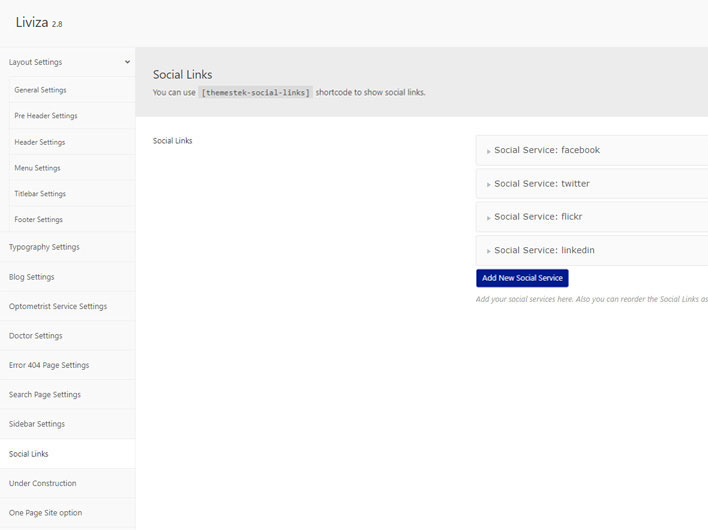
[themestek-social-links] shortcode. You can set Facebook, Twitter, LinkedIn, YouTube etc profile links from here and show them using this shortcode.
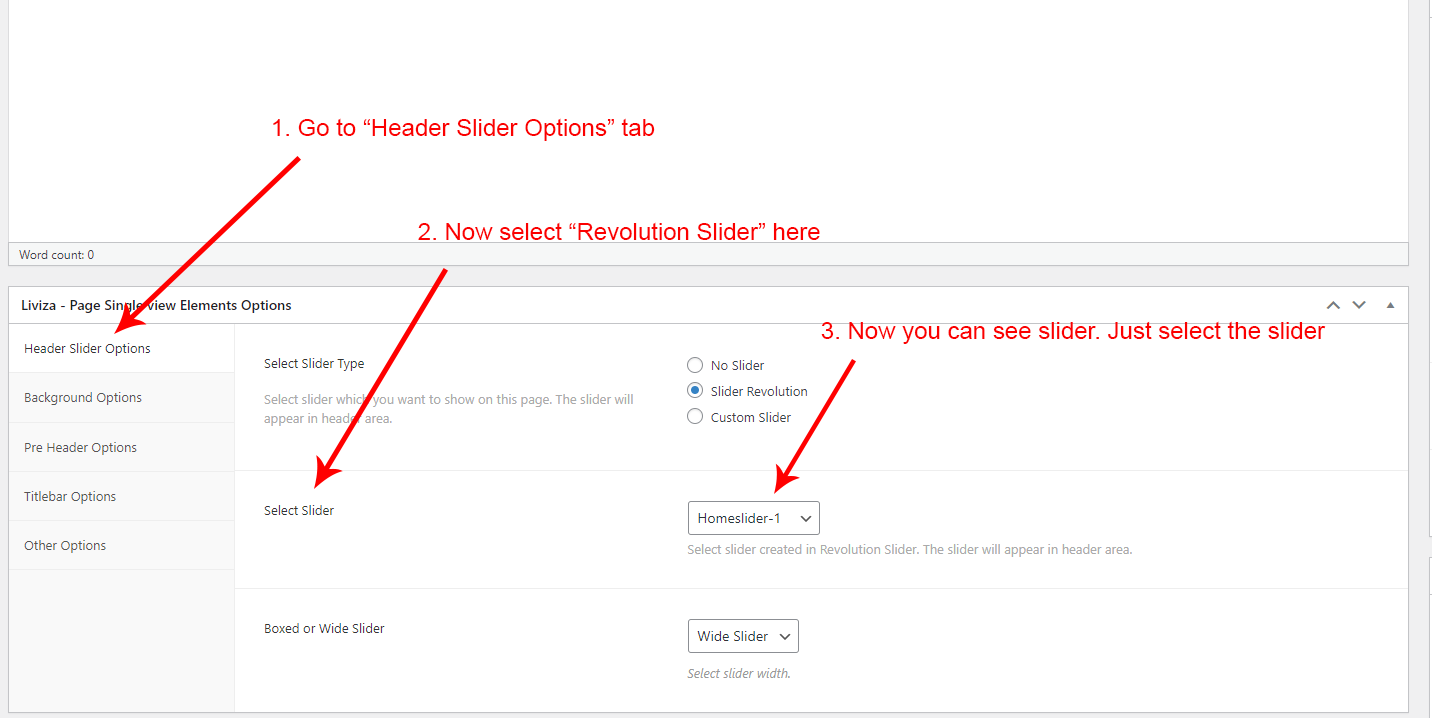
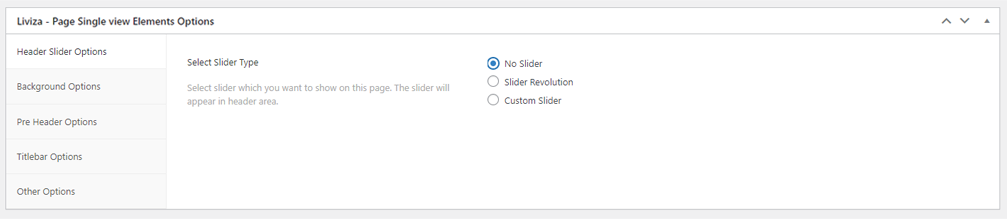
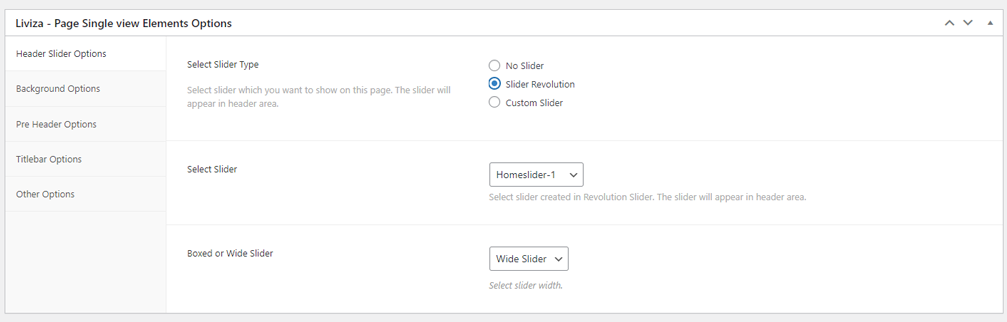
You can select your slider for header area on any page. Just edit the page (generally your homepage) and select the slider. Please see the screenshot given below:
It's very easy to create a new slider. Here is a getting started video where you can learn how to create a new slider or modify your existing slider. Click here to see their document and learn basics and become pro.
You can also see video to learn basics or Slider Revolution plugin. See this video:
Titlebar will appear below header and slider. This will show page title, sub-title and breadcrumb.
There are two types of options for Titlebar area:
You can see the screensot of the Titlebar Settings ( which appear under Liviza Options) provided on the right side.
This is global options and will apply globally to all Titlebar appear on any page/post/country/coaching etc.
This provides all options like background color, background image, font-family, height of the Titlebar, Titlebar style etc.
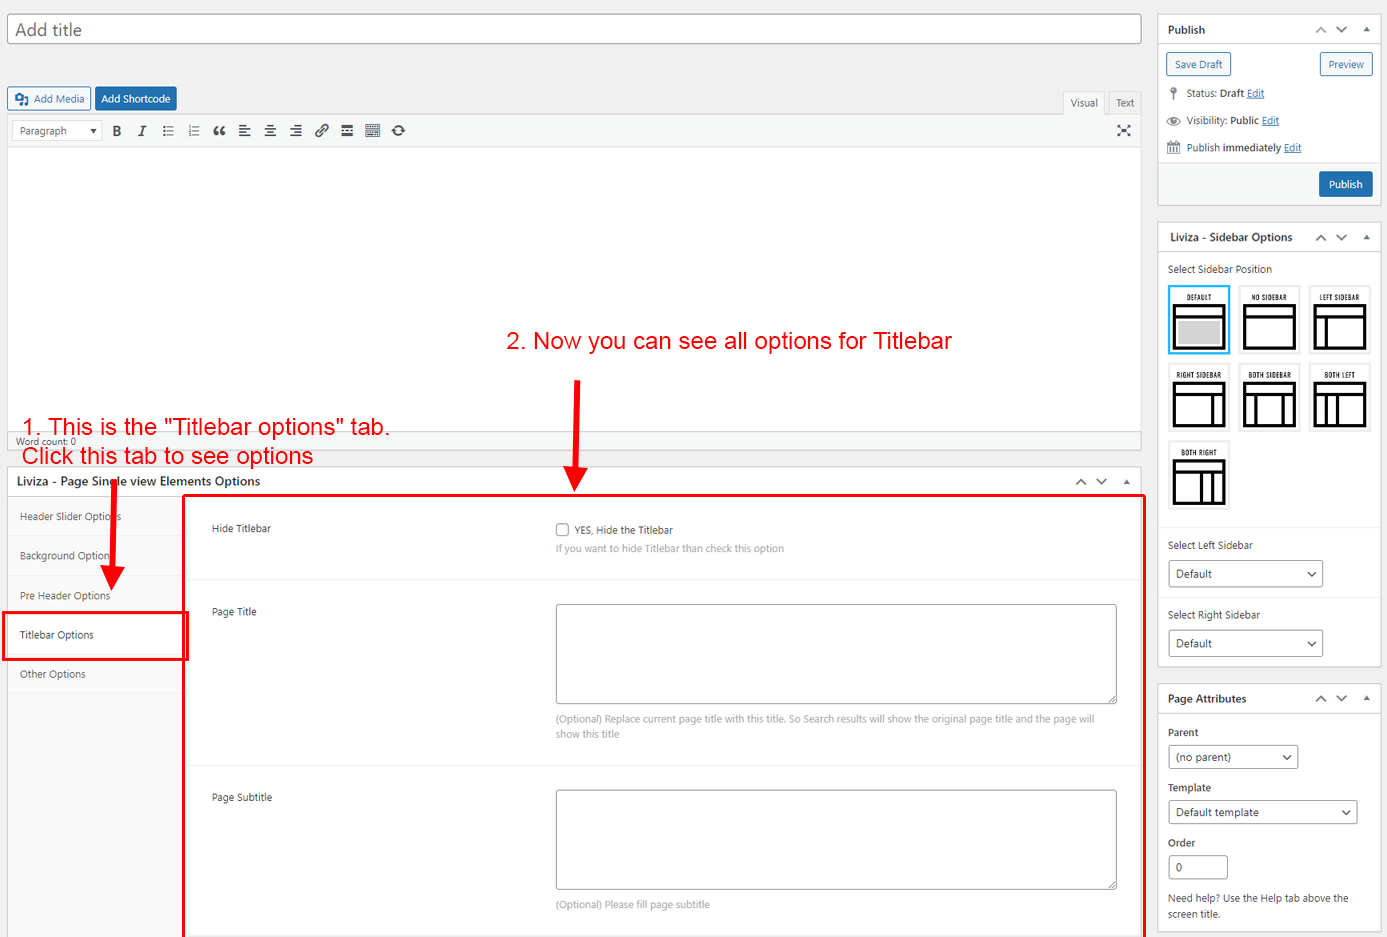
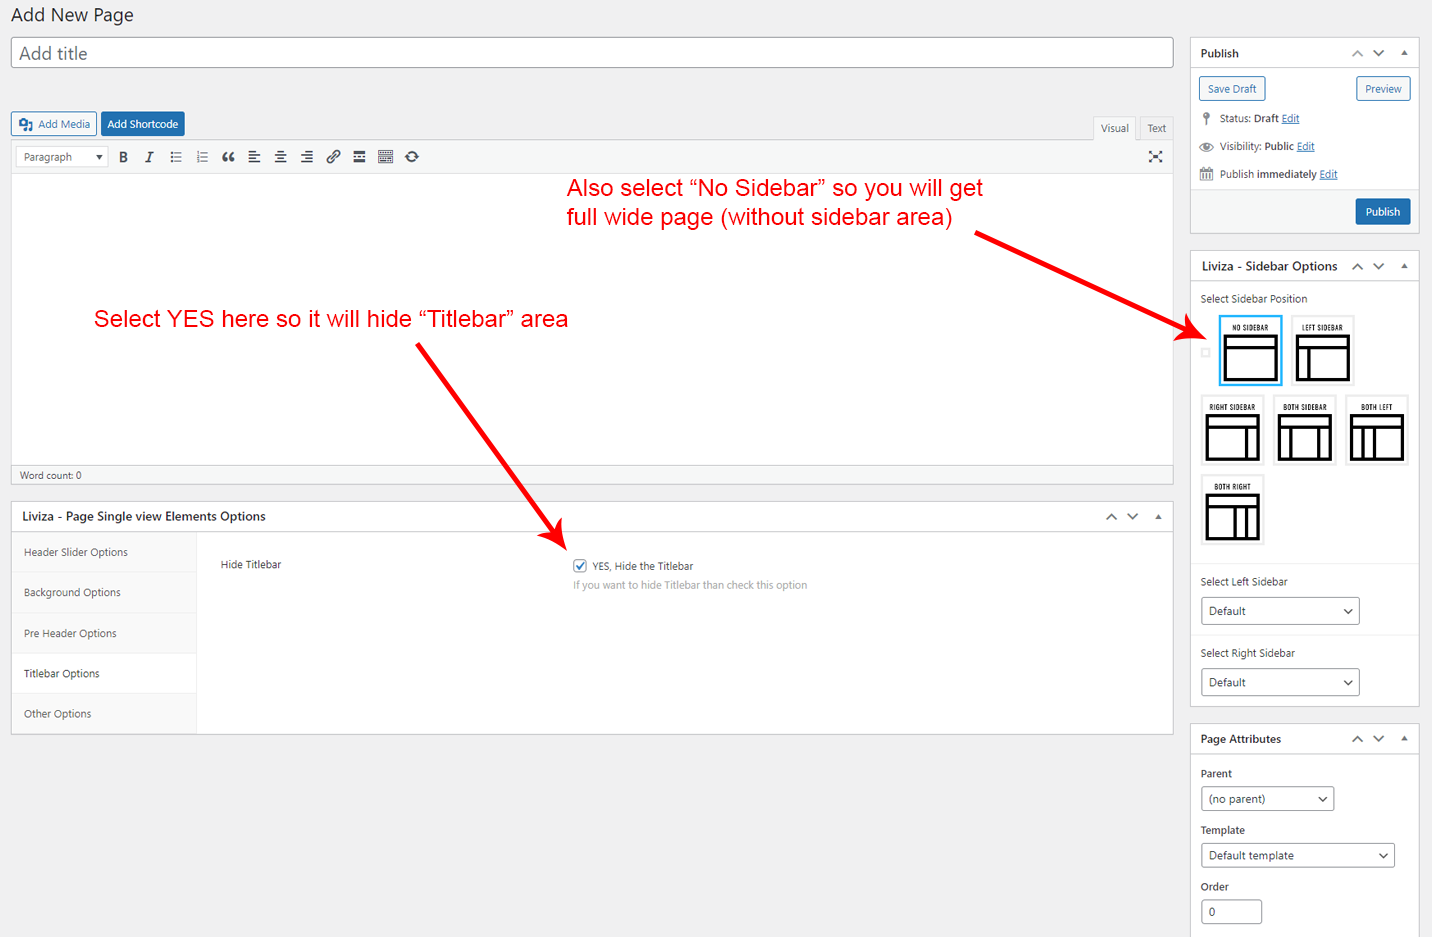
This will override the options set under Liviza Options > Titlebar Settings options. This will help you to set special design the Titlebar on specific page or post.
You can hide the Titlebar on a specific page by select YES in the Hide Titlebar? options.
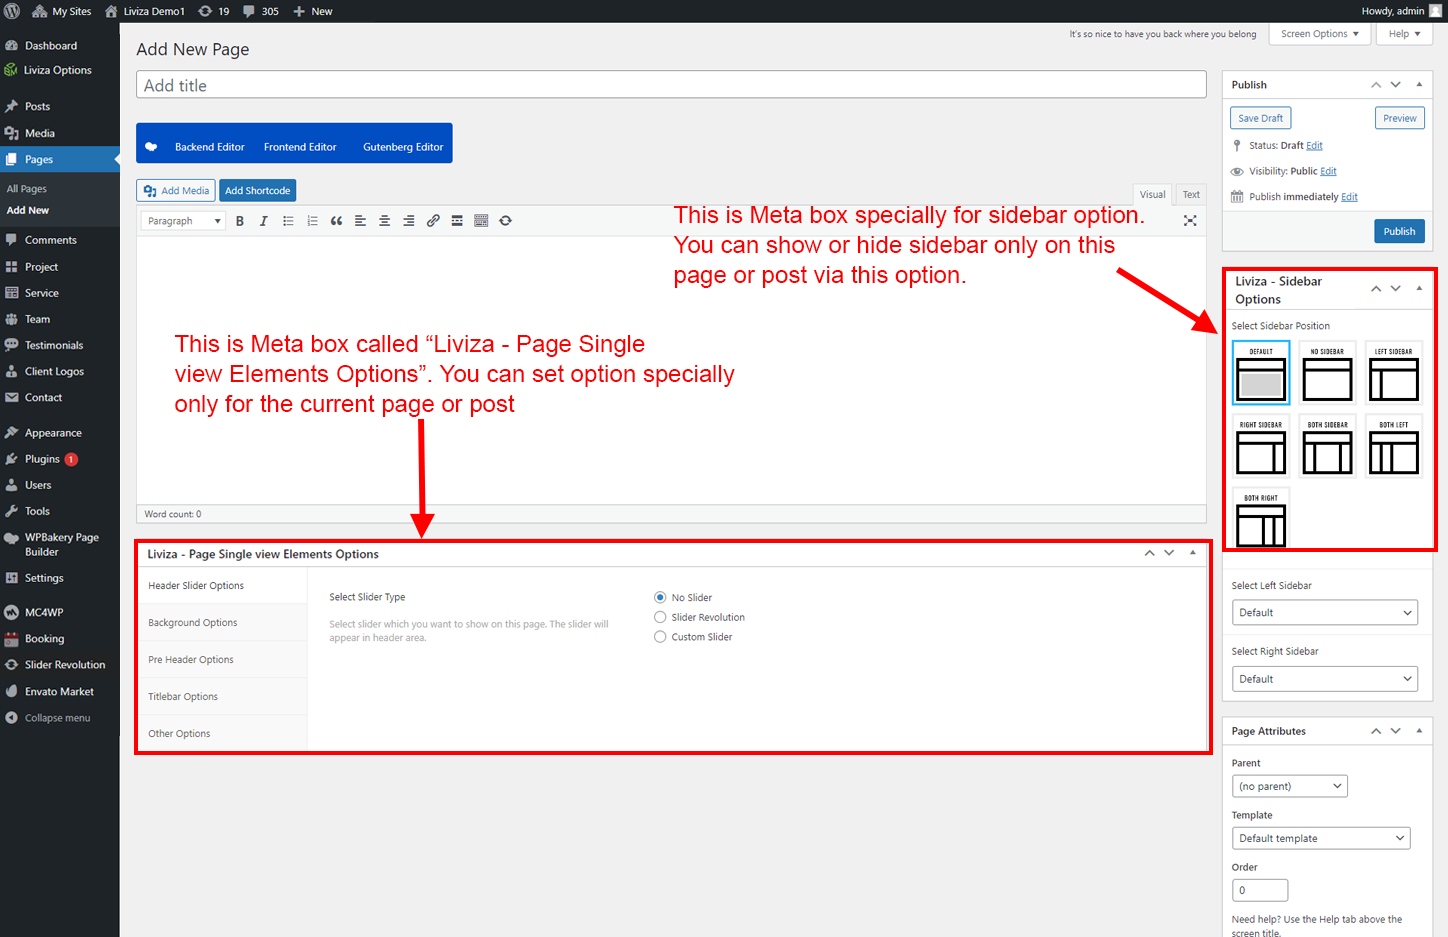
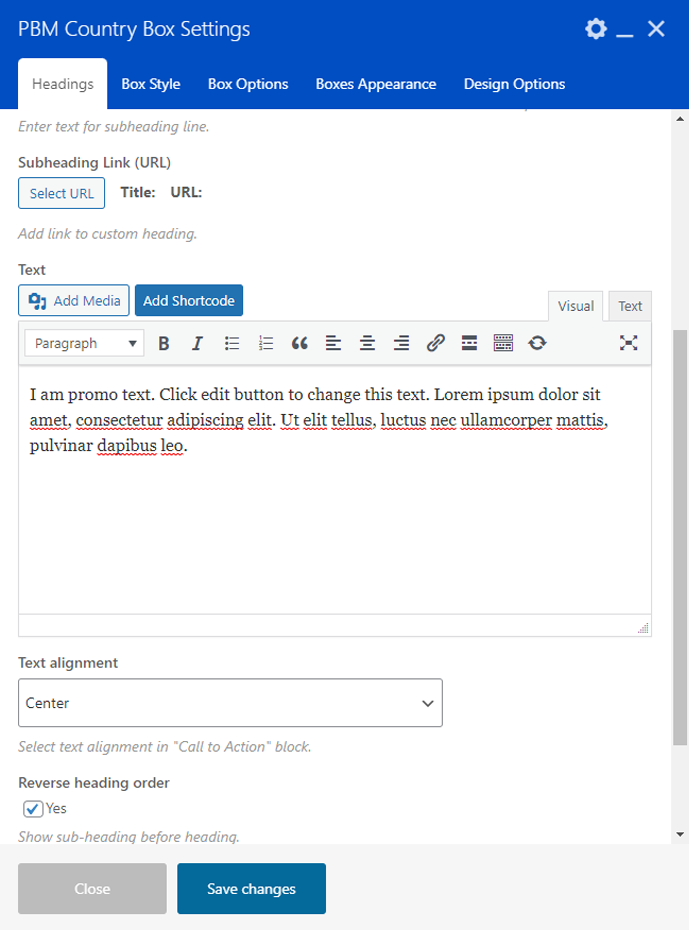
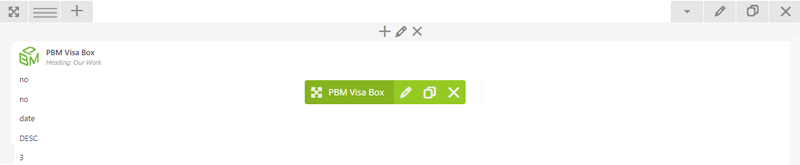
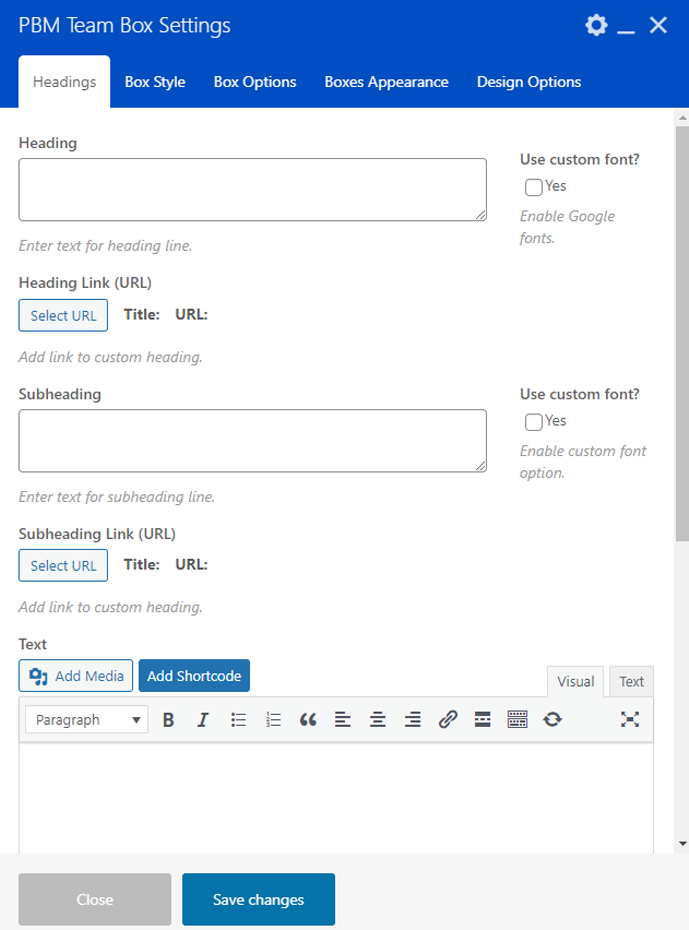
Meta box are special options that will apply to current page or post only. So you can set special view of a page or post. See above image for the Metabox example.
This metabox has three tabs.

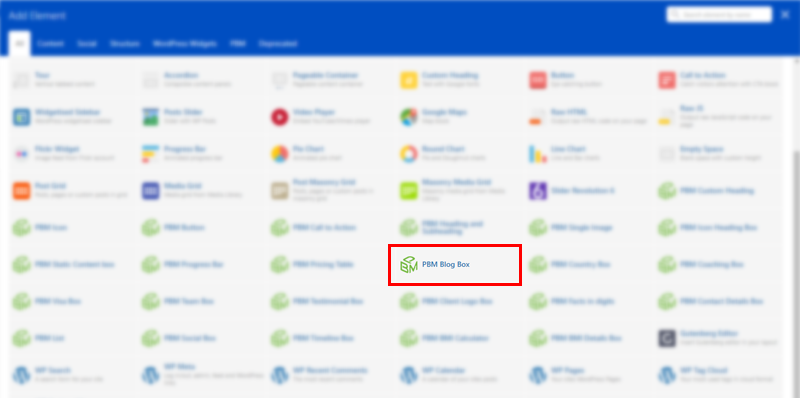
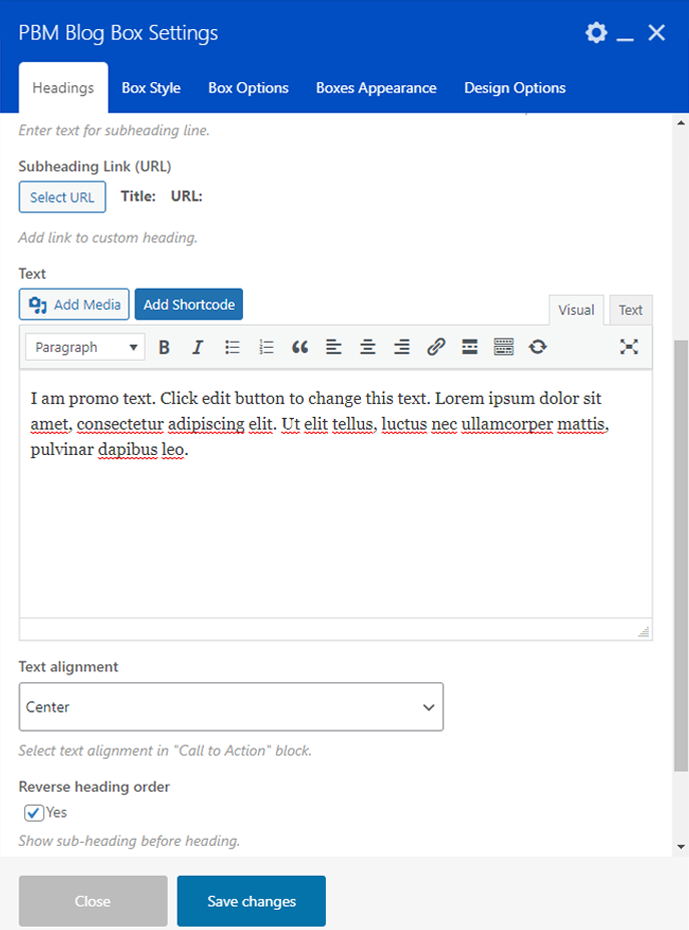
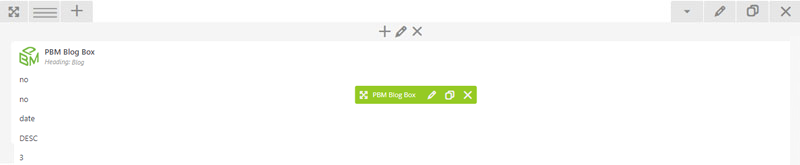
The Blog is core part of our Liviza theme. You can setup it very easily. Here are steps.
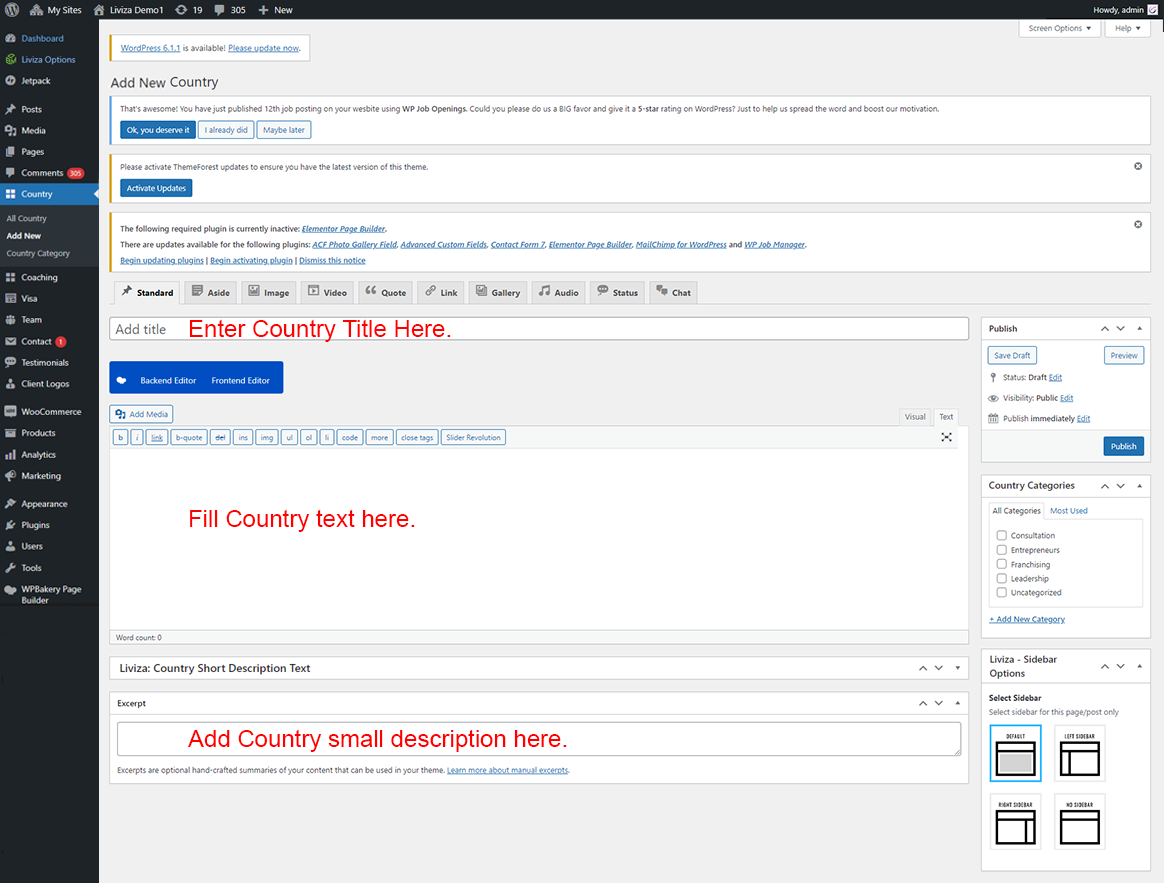
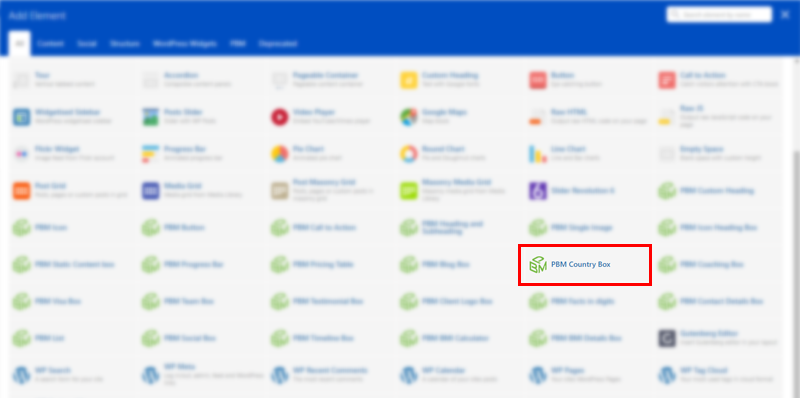
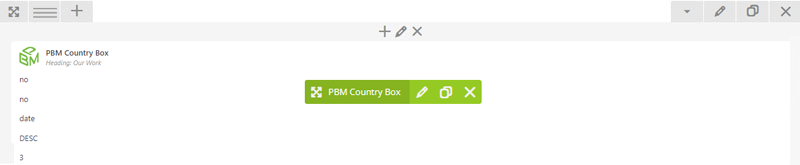
The Country is core part of our Liviza theme. You can setup it very easily. Here are steps.
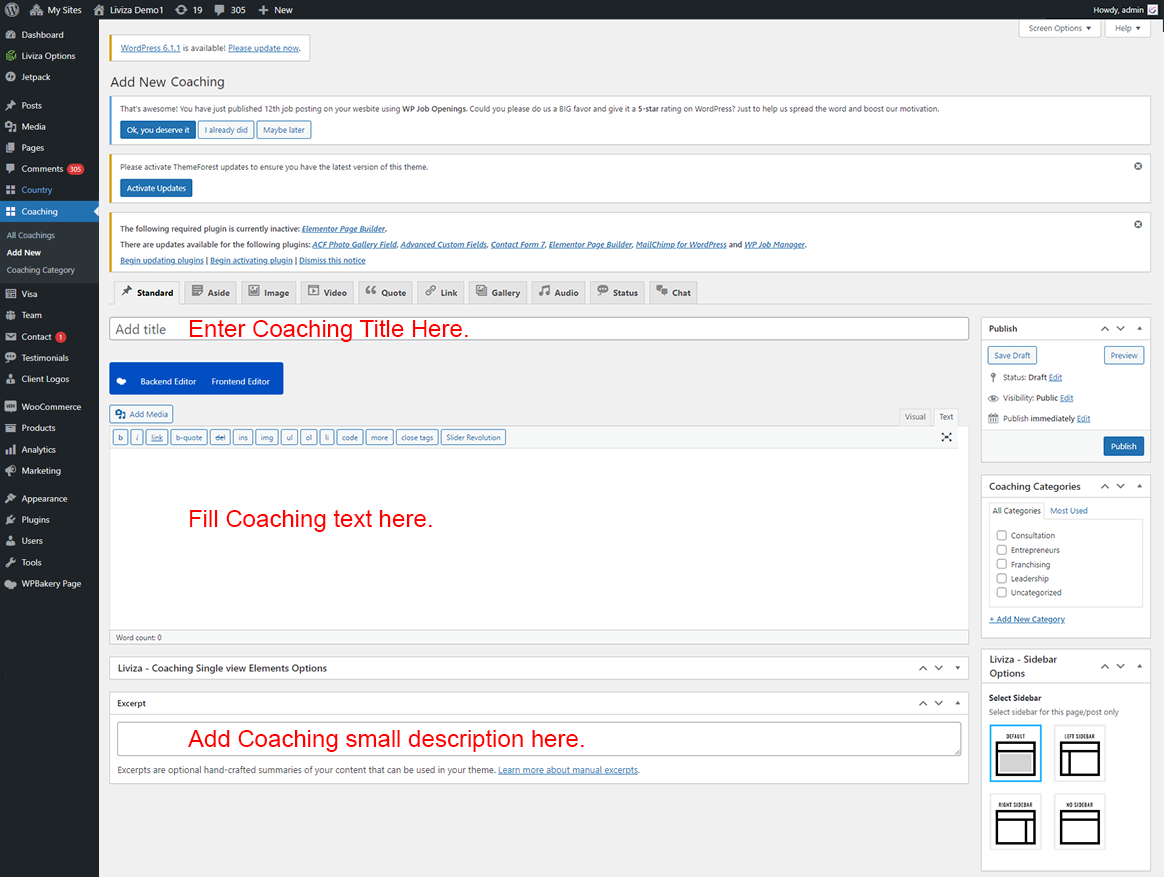
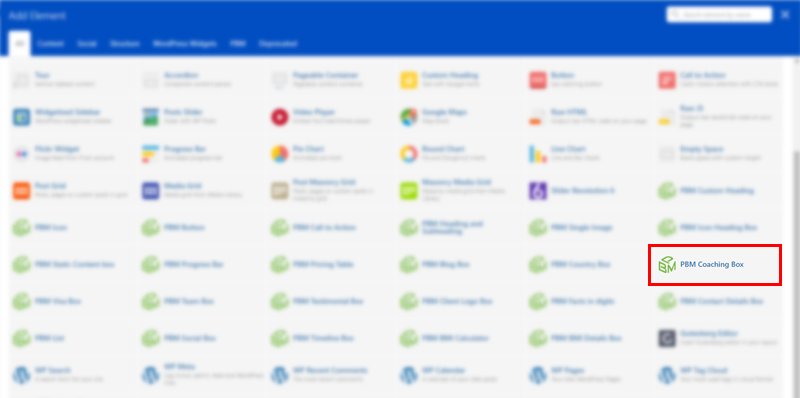
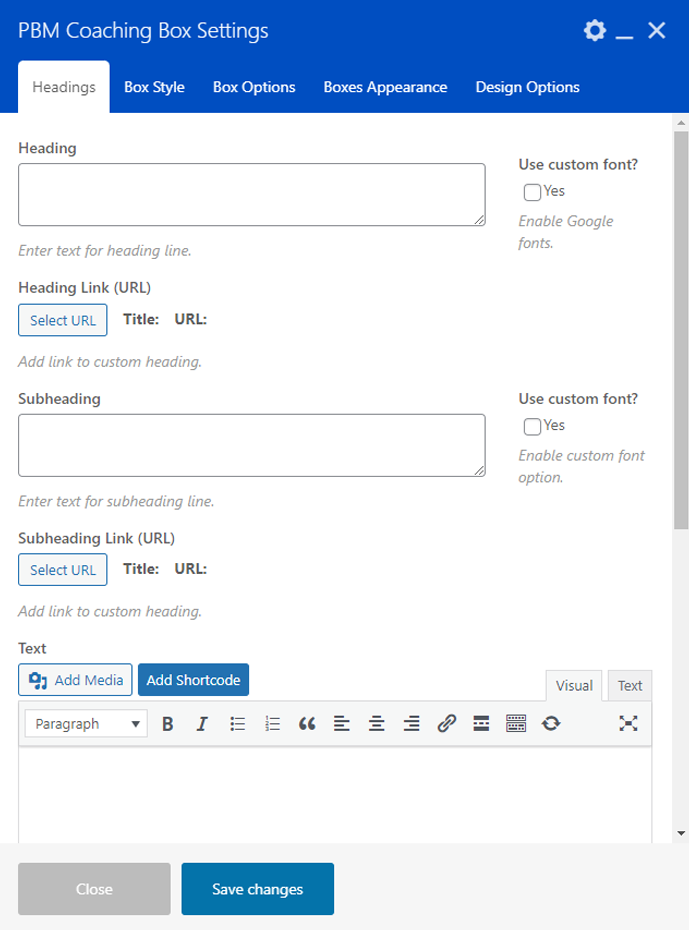
The Coaching is core part of our Liviza theme. You can setup it very easily. Here are steps.
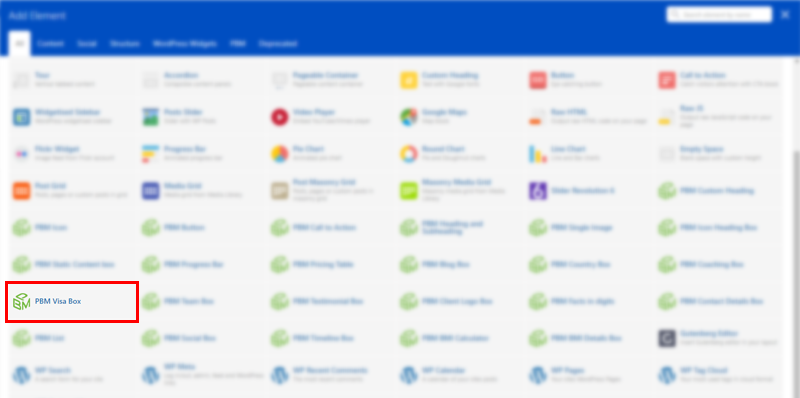
The Visa is core part of our Liviza theme. You can setup it very easily. Here are steps.


The Team Member is core part of our Liviza theme. You can setup it very easily. Here are steps.


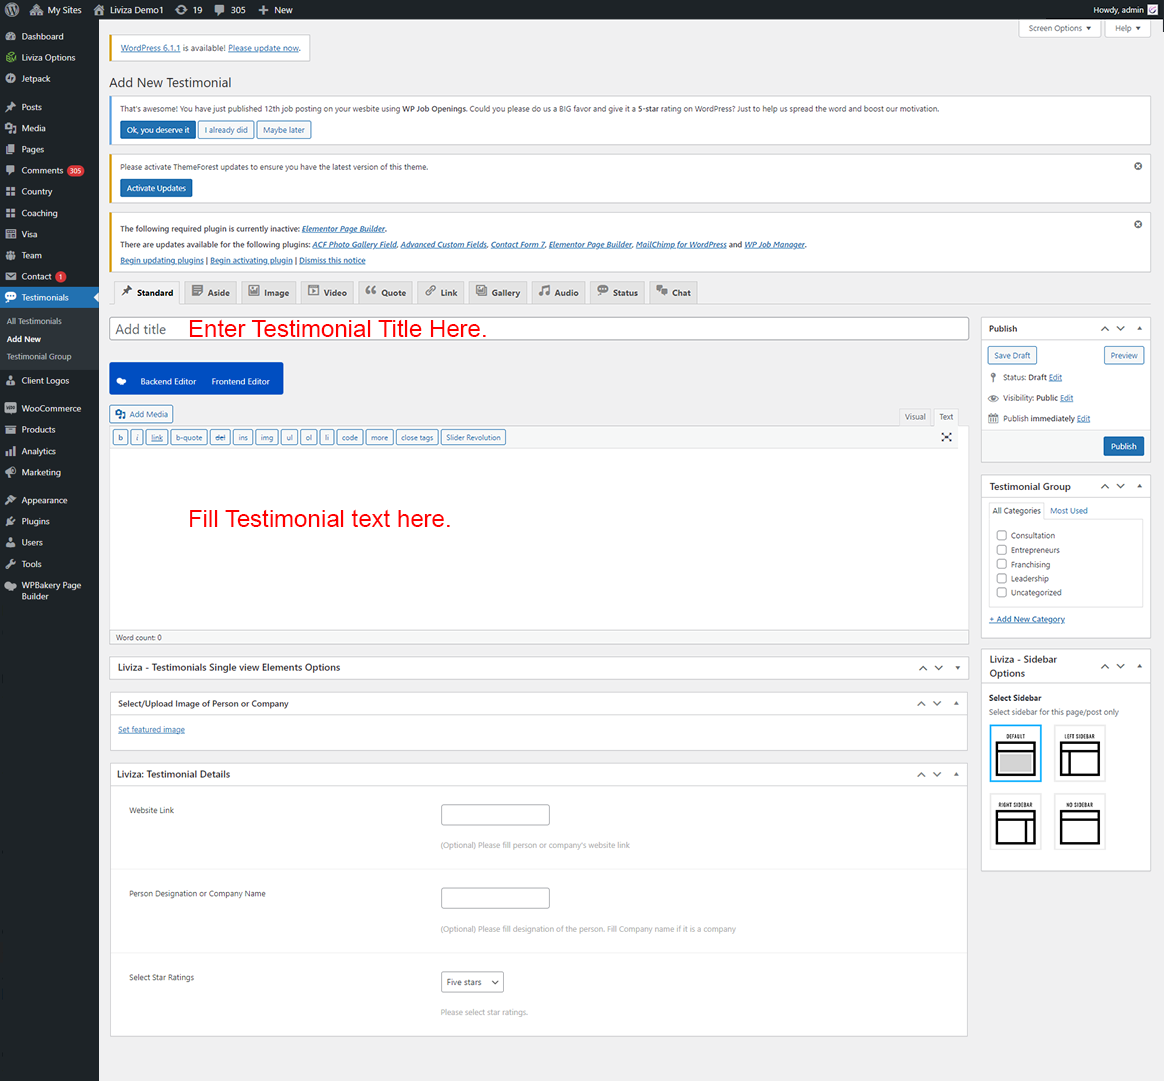
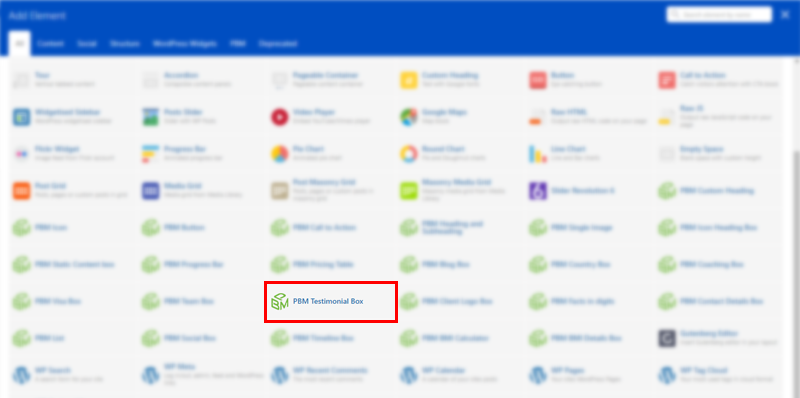
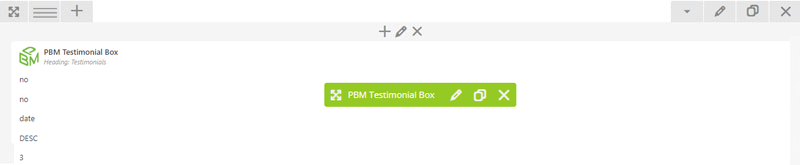
The Testimonial is core part of our Liviza theme. You can setup it very easily. Here are steps.

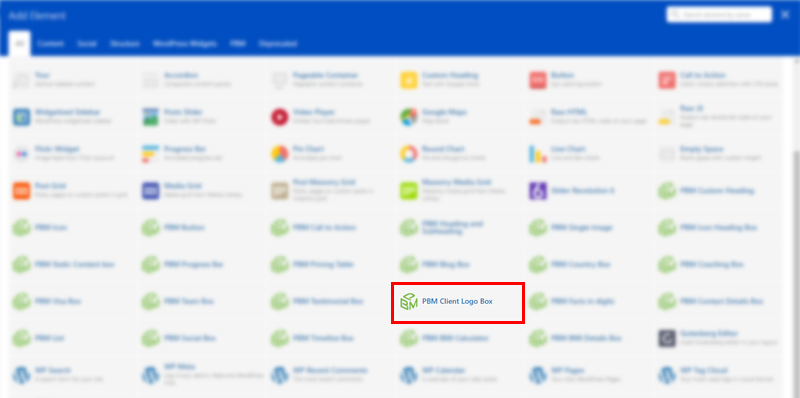
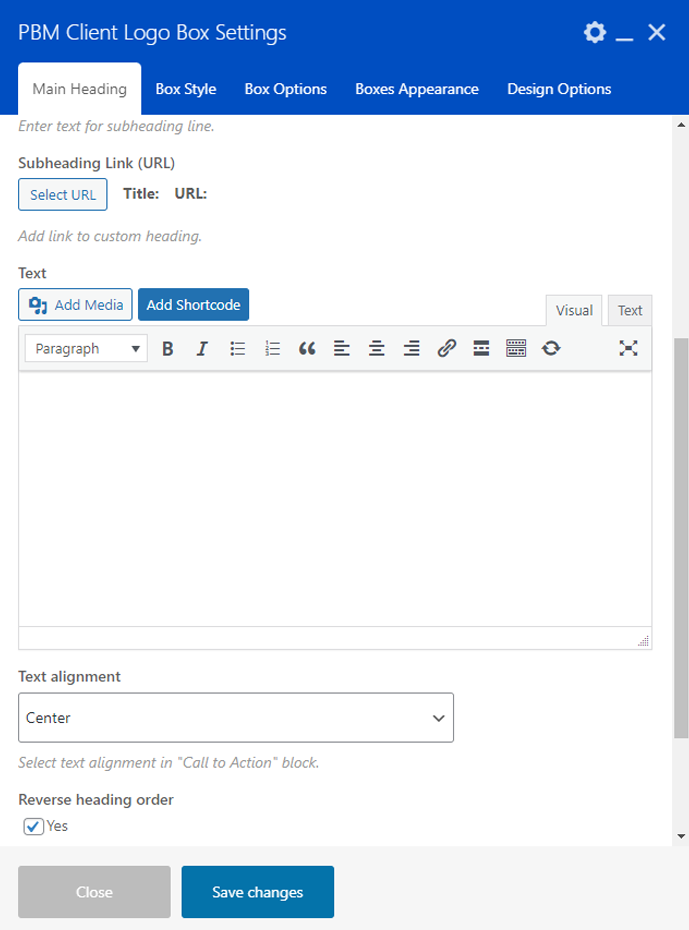
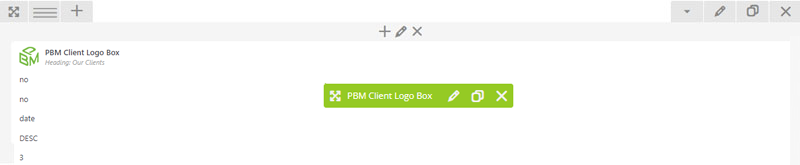
The Client Logo is core part of our Liviza theme. You can setup it very easily. Here are steps.

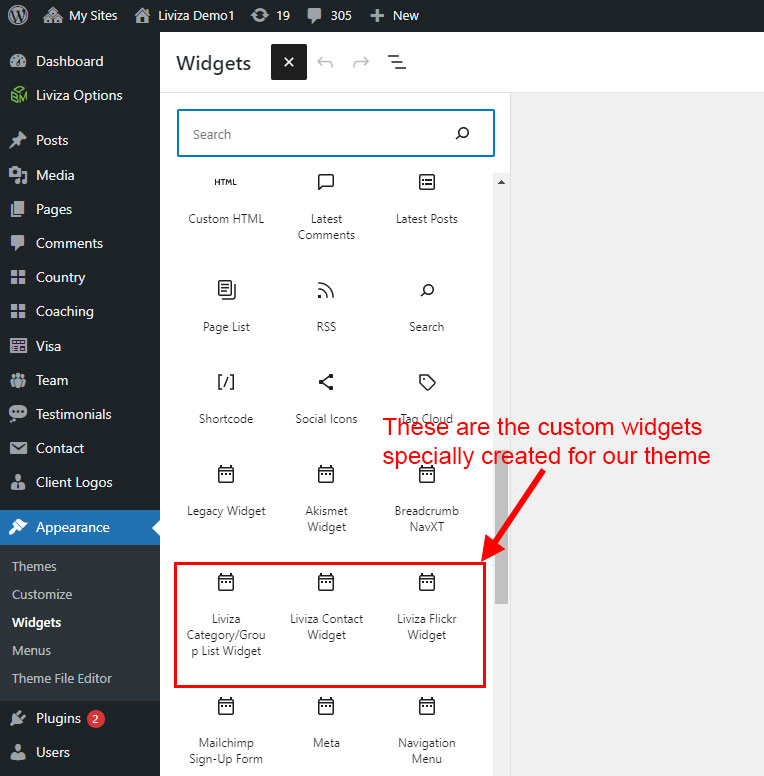
There are some widgets created specially for Liviza theme. Here are the widgets:
Liviza has some built-in Widget Positions to use. Here are details of each position:
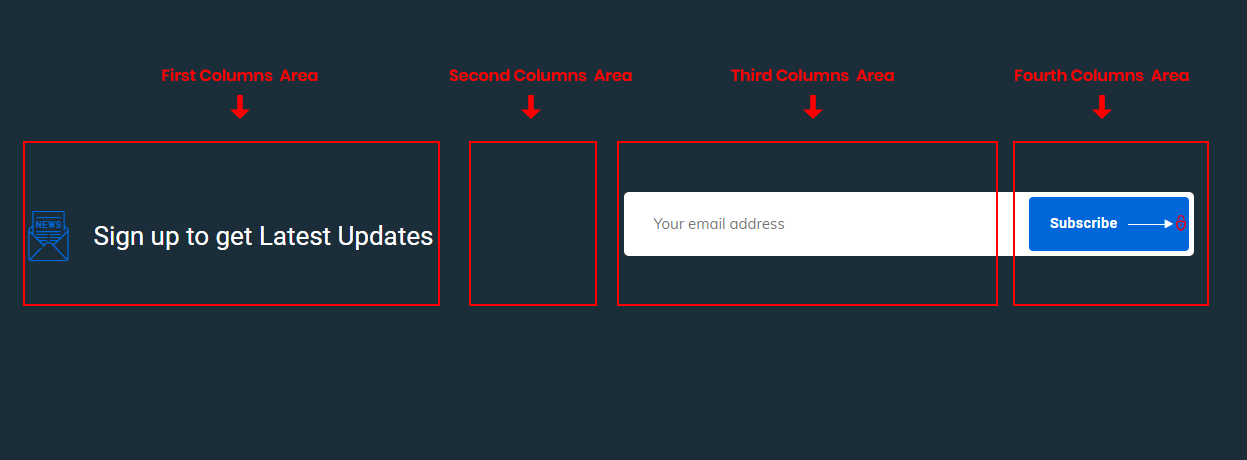
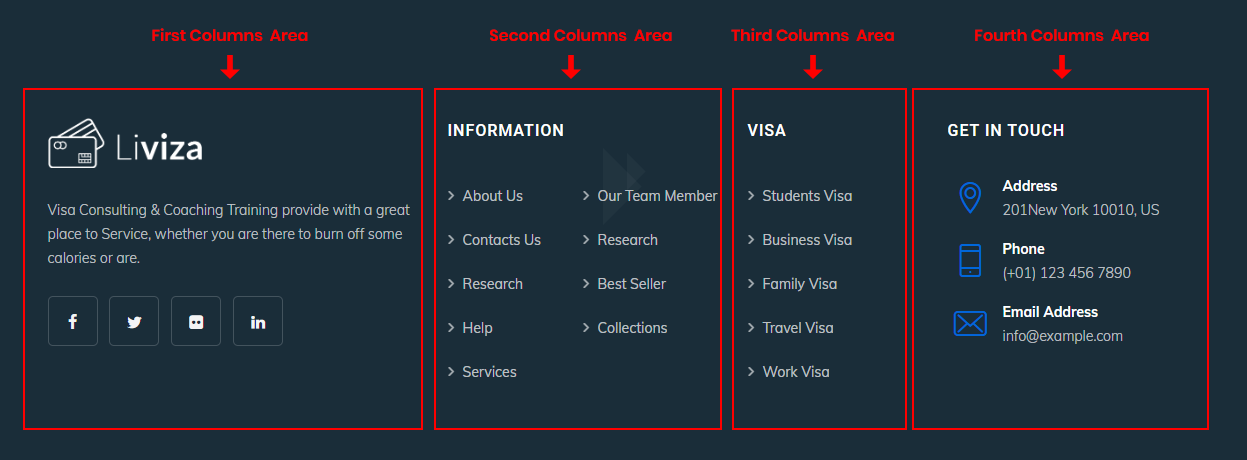
Liviza comes with special widget positions for footer area. Footer has TWO rows widget position with four widget columns in each:
Also you can also change the column view of the Footer widgets. Just go to Admin > Liviza Options > Footer Settings section and change the "Select Footer Column layout View" option:
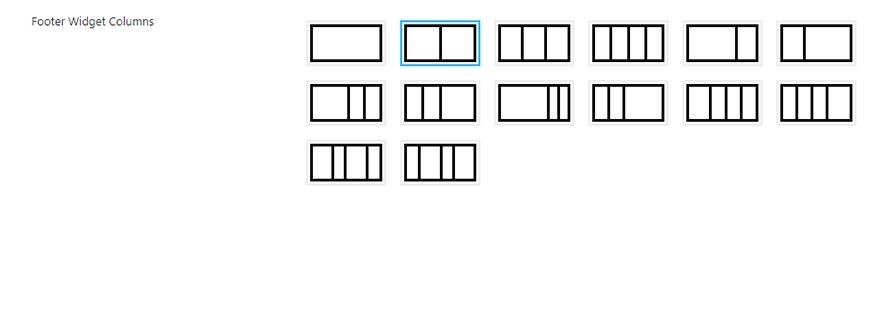
Also you can also change the column view of the Footer widgets. Just go to Admin > Liviza Options > Footer Settings section and change the "Select Footer Column layout View" option:
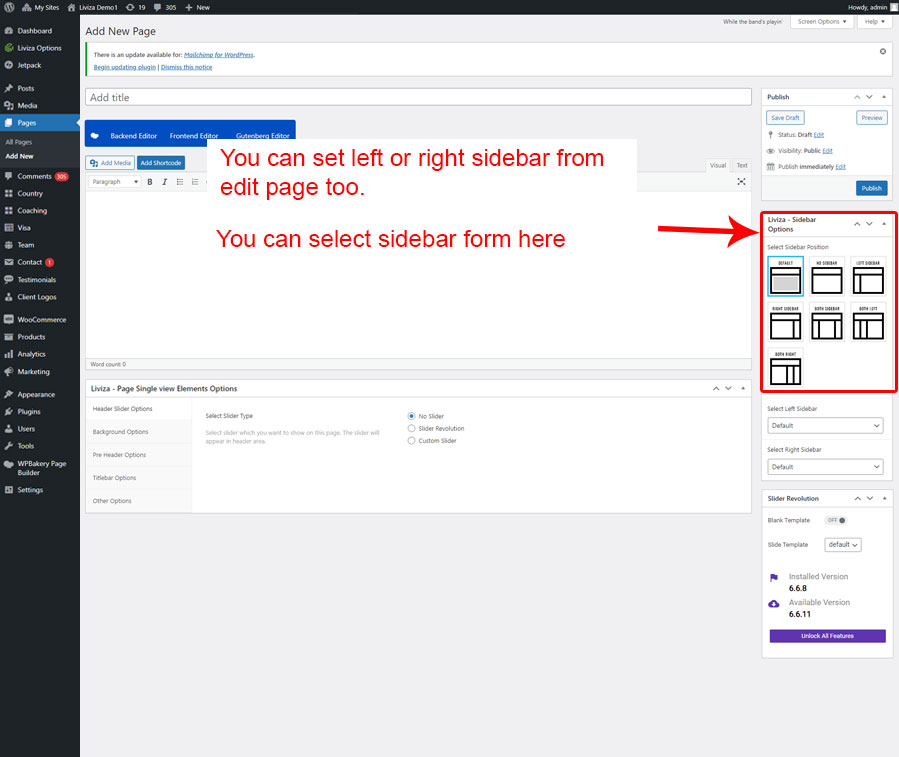
You can set sidebar for page from Liviza Options >> General Options section. There are three options:
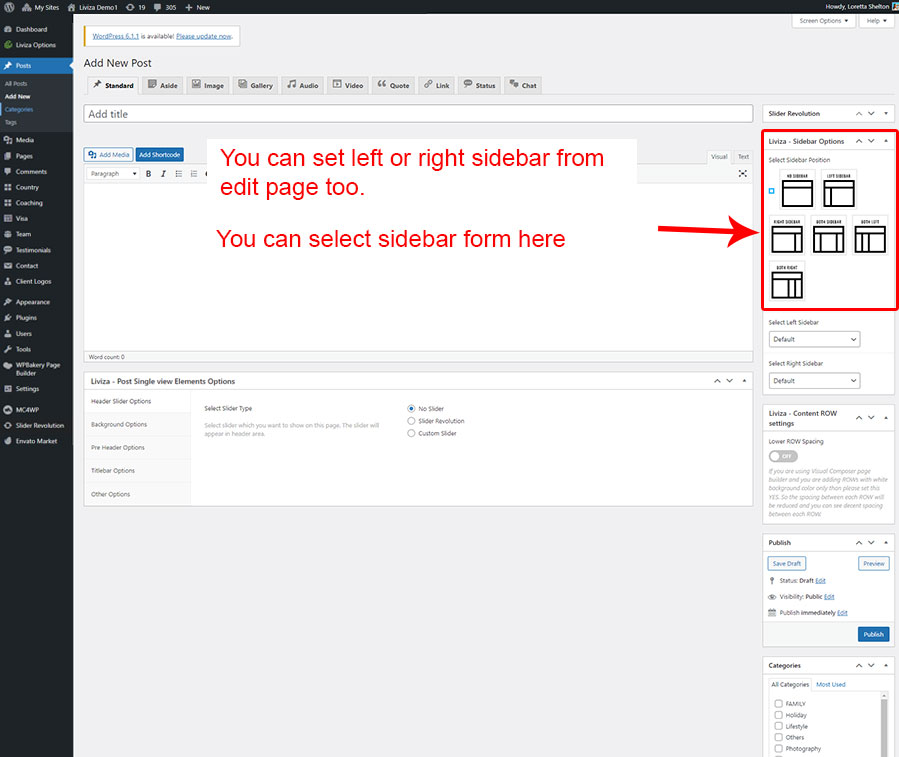
You can set sidebar for single post and category from Liviza Options >> Blog Options section. There are three options:
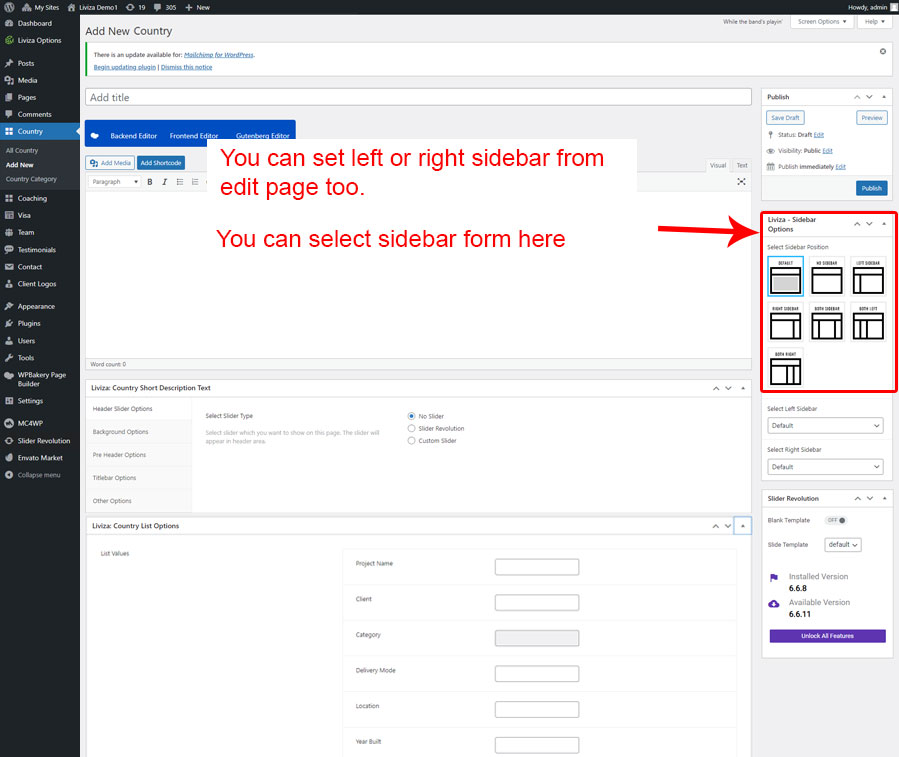
You can set sidebar for single Country and Country category from Liviza Options >> Country Options section. There are three options:
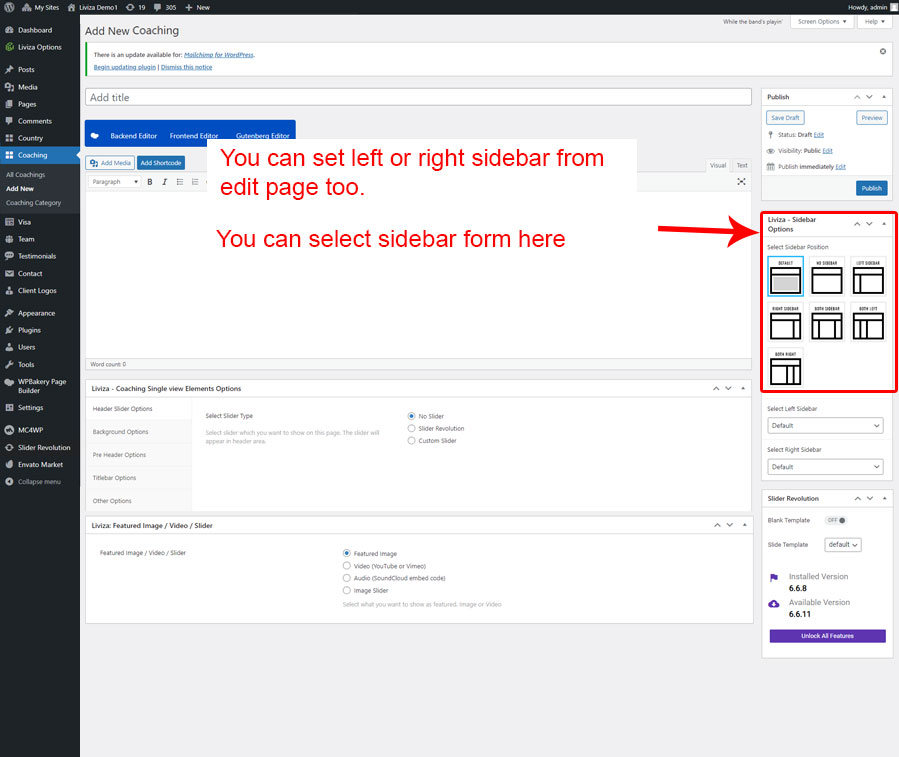
You can set sidebar for single coaching and coaching category from Liviza Options >> Coaching Options section. There are three options:

You can set sidebar for single visa and visa category from Liviza Options >> Visa Options section. There are three options:
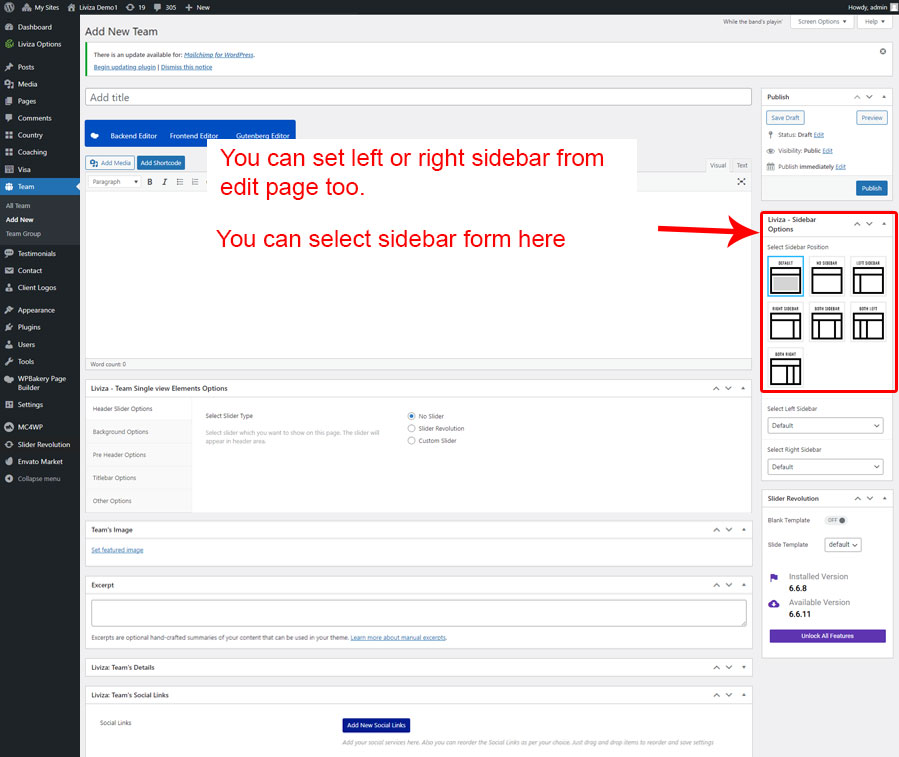
You can set sidebar for single team member and team category from Liviza Options >> Team Member Options section. There are three options:
This shortcode specially created to show social links. You can set social links in Liviza Options >> Social Links Section and write your social links. Than it can be shown using [themestek-social-links] shortcode.
Our themes are optimized by with H1, H2, H3, H4, H5 tags, clean code, HTML5 but if you want to get higher ranking on Liviza engines, you must need some help from SEO plugins and Google Pagespeed service:
To update theme, you should use "Envato Market" plugin as it will update theme in just one click. Just see Installing Theme section to get how to setup Envato Market plugin. Just configure it once and it will show theme update. Than you can update theme in just one click.
Within this section, you’ll find everything you need to localize and internationalize the Liviza theme into your language. It is split into several subsections to help you easily find what you need. There are different ways for this:
1. First you need to install "Loco Translate" plugin. So just go to Plugins > Add New section and search for "Loco Translate" plugin.
![]()
2. Install and activate the plugin.
3. Now go to Loco Translate section and click on Liviza theme.
![]()
4. Click on the New Language link.
![]()
5. Now select the new language. Also make sure you select the last option (the languages/themes/file.po option) so it will store file in "wp-content" folder.
![]()
6. Now it's ready to translate all texts. Just select the text which you want to translate and than write the translated text.
![]()
7. When finished, just click on Save button to save changes
![]()
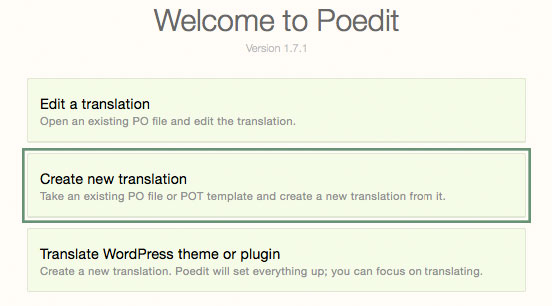
Inside the Liviza main theme folder, you will find a folder called languages. There is a file called Liviza.pot in this folder. This file can be used as a starting point to create your own translations, using e.g. a third party tool like POEdit.
Open the Liviza.pot in POEdit by selecting "New from POT/PO file...".
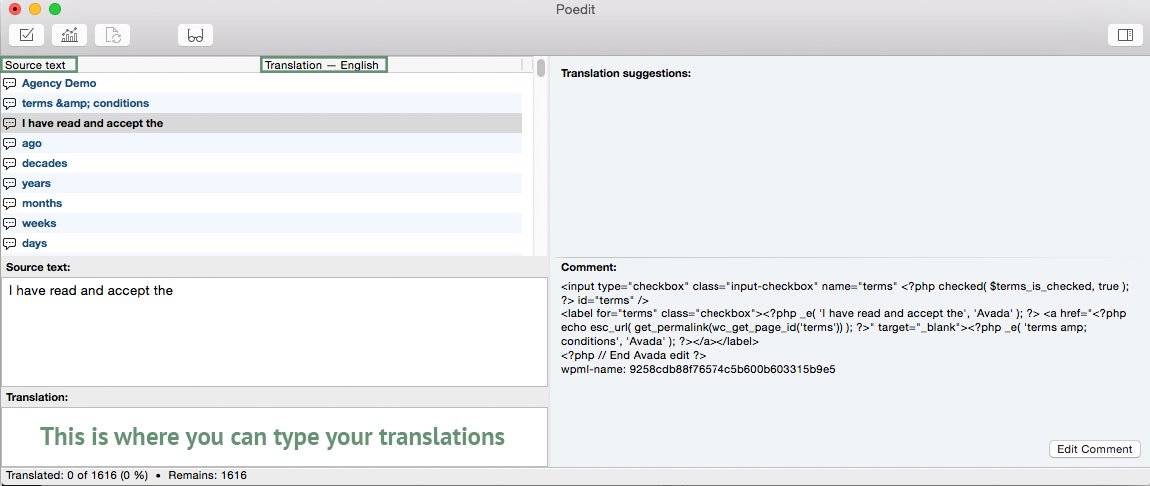
Once it has loaded, you will find all English text strings in the left column
called Source Text. Once you add translations, they will show up in the right
column under Translation.
When you are done translating all the needed text strings into your desired language, save the file in /wp-content/languages/themes/ folder with language code in name. For example, if you were translating to the Deutsch language, you would save it as Liviza-de_DE.po. The corresponding Liviza-de_DE.mo file will be auto created by POEdit software.
Now upload both Liviza-de_DE.po and
Liviza-de_DE.mo file on your server in
/wp-content/languages/themes/ folder. If you are not sure for
your language code than click here to get list of code for each language.
WPML (The WordPress Multilingual Plugin) is one of the most popular translation plugins on the market. With WPML you can translate pages, posts, custom types, taxonomy, menus and even the theme's texts. We work directly with the WPML team to guarantee 100% compatibility between Liviza and the WPML plugin.
To get started with Liviza and WPML, you will need:
Please install this plugins:
NOTE: You must have WPML subscription to download all plugins.
Please click here for more detailed information about all WPML plugins
You can translate any types of contents on your site, including pages and posts. To translate a page you need to go to Pages menu and in the list you will see columns for each active language, with a pencil icon (for ‘edit translation’) or a ‘+’ icon (for ‘add translation’) next to each page.
Read more on WPML site directly
The Liviza Options can be translated from "String Translation" section in WPML plugin.
Know how to translate Liviza Options using "String Translation"
WPML lets you translate all content, including content coming from custom fields.
Know how to translate Meta Boxes
Liviza comes with extra custom post types such as Country and Testimonials, and custom taxonomies. In order to get a similar interface for translation/duplication as for posts and pages, you need to go to WPML > Translation Management, and select the tab Multilingual Content Setup.
Click here to see how to translate it.
WPML can synchronize menus for you. This means that if some entries, for example some pages, posts or categories, are in the English menu, WPML can generate and keep in sync menus for other languages pointing to the translated versions of these pages, posts or categories.
Go to Appearance > Menus and you can see your existing menus. Here you can add menu translations and synchronize menus across translations.
To show the language switcher in the Menu go to WPML → Languages → Language switcher in the WP Menu and select menu that is your Main menu. See more details here.
Currently there are no FAQ. We will update this section in future.
We have dedicated support system where you can ask question and get
support for our theme.
Go to support site